Nourish

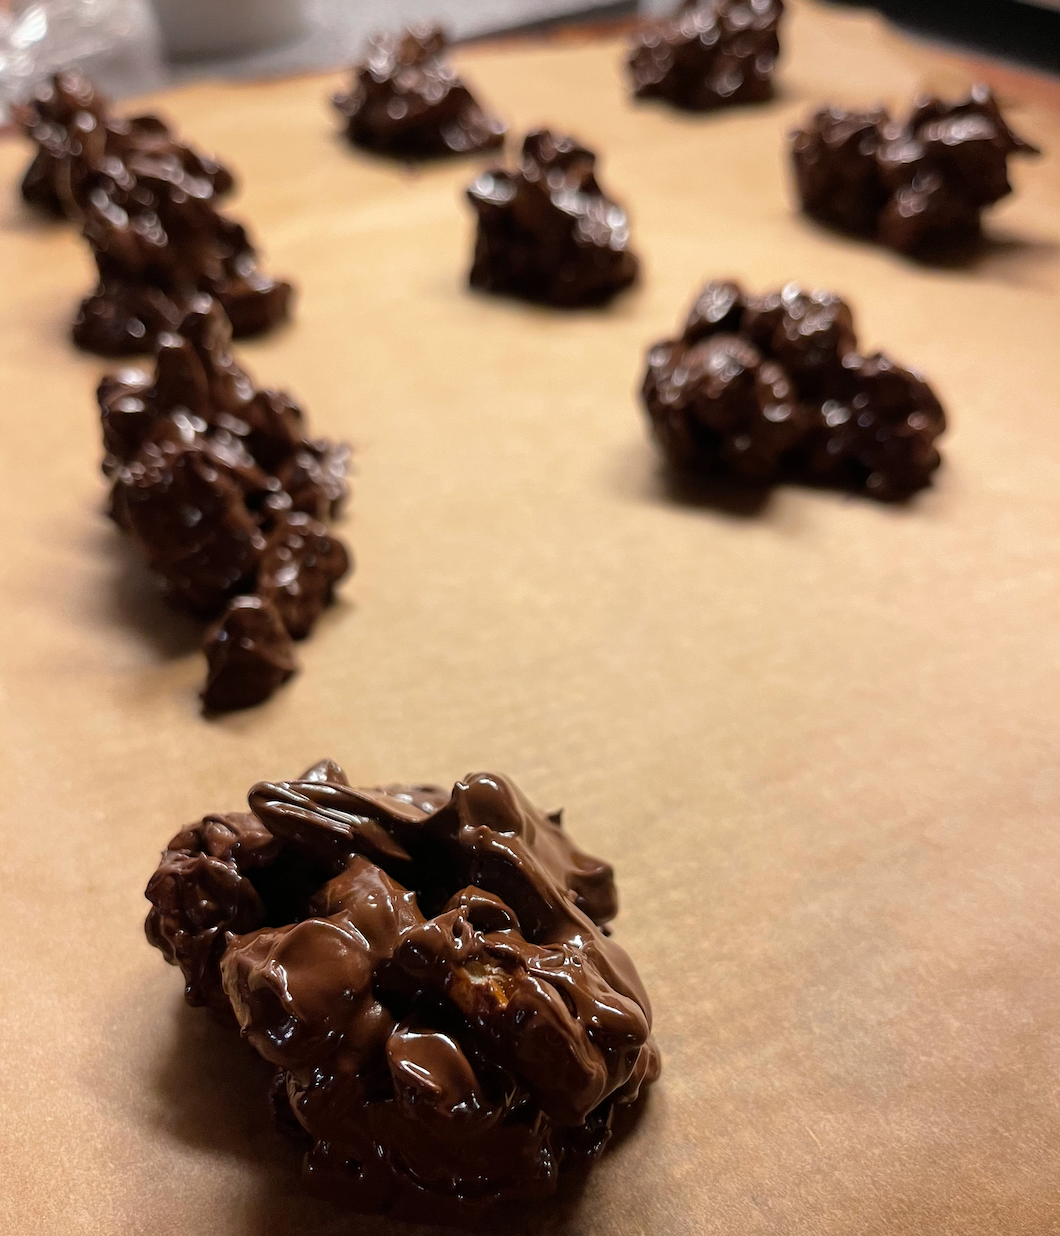
Dark Chocolate & Dried Fruit Nut Clusters

What’s a better combination than nuts and dark chocolate? For me, this is one of my favorite combos.

The more I explore nutrition and fuel, the more I learn how important it is to eat protein with sugar to support your blood sugar levels staying balanced. You can learn more about the science of sugar cravings in this podcast.

This recipe is so simple, delicious and hits the sweet tooth craving spot. It’s a great recipe to make so that you have nutritionally dense sweets around (when you want them), a great dessert to bring to friend’s houses or a homemade gift to share.

Ingredients:

  • Two cups of your favorite mixture of raw or toasted nuts. I used Trader Joes’ Simple The Best Trek Mix which has cashews, almonds, dried cranberries, dried cherries and dried pineapple. I also added raw walnuts and pecans. Get creative here! Next time I want to try dried candied ginger.

  • 1 cup dark chocolate chips or your favorite chocolate bark. (I love Ghirardelli 60% or 365 Brand chocolate chips)

  • Sprinkle of sea salt (optional)

Double Boiler

Directions:

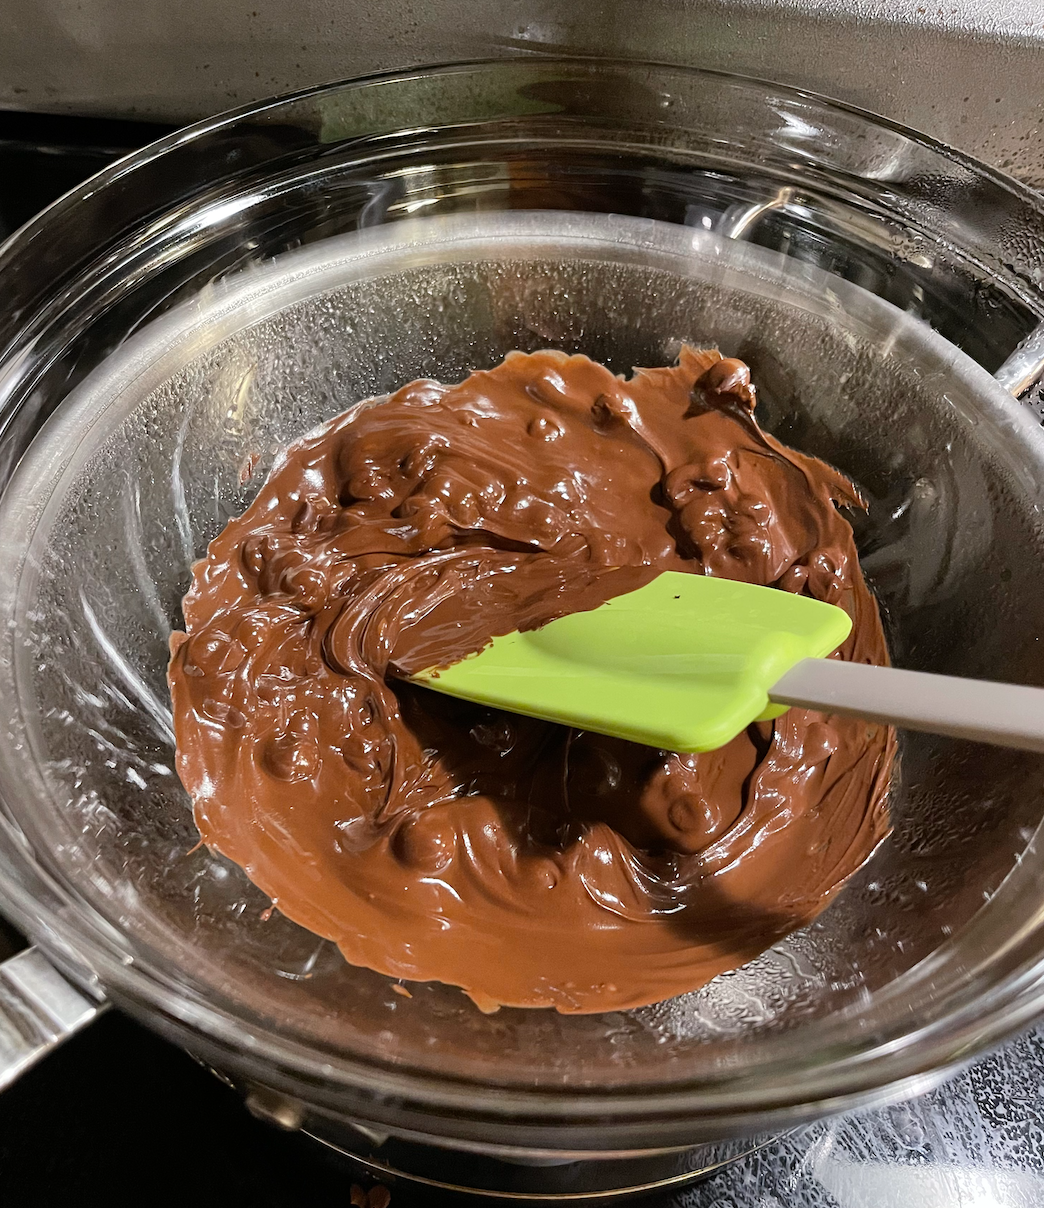
  1. In a double boiler, heat up up a pan of water. Place the cup of chocolate chips in the double boiler so they can gentle melt without burning. Continuously stir and watch the chocolate evenly melt. Pay attention to how the color and texture shifts. Notice any urge to snack on the chocolate as you make it—what does it taste like? Notice the smells. Does chocolate evoke any memories for you?

2. Once the chocolate melts, turn off the stove top. Add the cups of nuts and fruit to the chocolate mixture and evenly stir.

3. On a cooking sheet, place parchment paper down, scoop your desired cluster size of nuts/fruit from the chocolate bowl and place on the cookie sheet.

4. Optional to sprinkle a little sea salt on top of each cluster if you like a salty sweet finish.

5. Place tray in the fridge for a minimum of 30-minutes to let the clusters harden into shape.

6. Store your clusters in an airtight container and keep in the fridge or freezer.

7. Enjoy mindfully eating and sharing these delicious clusters.

Ssamjang (Korean Dipping Sauce)

I was introduced to this sauce while on a meditation retreat and it was so delicious I asked the chef to share the recipe. This sauce is a delicious combination of light spice and sweet. Great to add to any rice or noodle bowl, lettuce wrap, taco or meat satay.

Ingredients:

  • 10 garlic cloves (for garlic confit)

  • 1/4 cup olive oil

  • 3 tablespoon Gochujang (Korean Chili Paste)

  • 3 tablespoon maple syrup

  • 3 tablespoon sesame oil

Directions:

  1. Let’s make the garlic confit! Peal 10 garlic cloves and add them to a small pot with 1/4 cup olive oil. On low heat, simmer the garlic in the olive oil for 30-60 minutes. Lots of patience is needed here to slowly cook the garlic. Watch with care and curiosity to make sure the garlic isn’t burning, but gets a light browned color and is fully soft. Notice the smells of garlic. Notice your relationship to patience as you stir the garlic and check on the progress.

  2. Once the garlic confit is fully browned and tender add to a small blender or bowl with the olive oil, sesame oil, maple syrup and Gochujang paste. This sauce will be thick. Taste it. Do your taste buds want more sweet or spicy flavors? Does it feel balanced to you? Add more maple syrup if you want it more sweet.

  3. Store leftover sauce in the fridge for two weeks and use on various dishes to help spice up your dishes with some sauce made with lots of love.

Miso Glazed Carrots

Ingredients:

  • 10 large whole carrots. Washed with the tips cut off.

Miso Glaze:

  • 2 tablespoons white miso paste

  • 1 teaspoon honey (or maple syrup)

  • 1 tablespoon Braggs amino acid (you can also use soy sauce)

  • 1 garlic clove

  • 1 tablespoon sesame oil

Directions:

  1. Preheat the oven to 400F

  2. In a small blender or bowl, add the above ingredients for the miso glaze. Combine until the sauce is smooth. Notice the smells. Do memories come alive to you? If the sauce is too thick to spread evenly, add a tablespoon of water.

  3. Prep the carrots and place on a baking sheet. Optional to use parchment paper. Evenly coat the carrots with the miso glaze. Notice your thoughts and relationship to carrots. (For instance, sometimes I notice I take carrots for granted because they are so cheap. Or I only use them in salads or juices and it feels “silly” to make them the main veggie.) What comes up for you?

  4. Roast in the oven for 30ish minutes, rotating the carrots half-way through. When the carrots cut easily with a knife and have a light browned dehydrated look, they are finished cooking.

  5. Let them cool and serve them however you’d like. I like to cut them into inch sized pieces if I am adding them to a bowl. Otherwise, keeping them whole is a fun way to cut them and eat them like “steaks.” Listen to what your body and intuition want here. You can do no wrong!

Comforting Chilaquiles

I loved playing with this recipe in the kitchen while in Mexico. This dish was way easier to make then my mind thought it would be, delicious, fun, festive and very satisfying. This recipe serves about 2 people. You can also double this recipe for a fun interactive brunch so people can add additional toppings or sides. Or you can enjoy leftovers or save some of the salsa roja for future dishes. The main part of this recipe is making the delicious salsa roja sauce that I think would taste great over any grilled meat or toasted beans.

Ingredients:

  • 2 roma tomatoes

  • 1/4 of a white or yellow medium sized onion

  • 3 garlic cloves (peeled and crushed or chopped)

  • 3/4 cup veggie or chicken stock

  • Salt to taste

  • Two generous handfuls of tortilla chips. (The thicker the better soo they can hold the sauce).

  • Optional: if you enjoy spice you can add 1 small jalepeno with the seeds removed or your favorite hot sauce of choice.

  • Optional toppings: fried egg(s), sliced avocado/mashed/guacamole, cotija cheese, your favorite beans etc

Directions:

  1. Wash and chop the tomatoes, onions, garlic and jalepeno. Notice your relationship to each ingredient as you chop. What thoughts go through your mind as you notice the tomato juice/seeds squirt out? How does you your senses respond to the smell of onions and garlic. What is your relationship to the jalepeno as you touch and chop it?

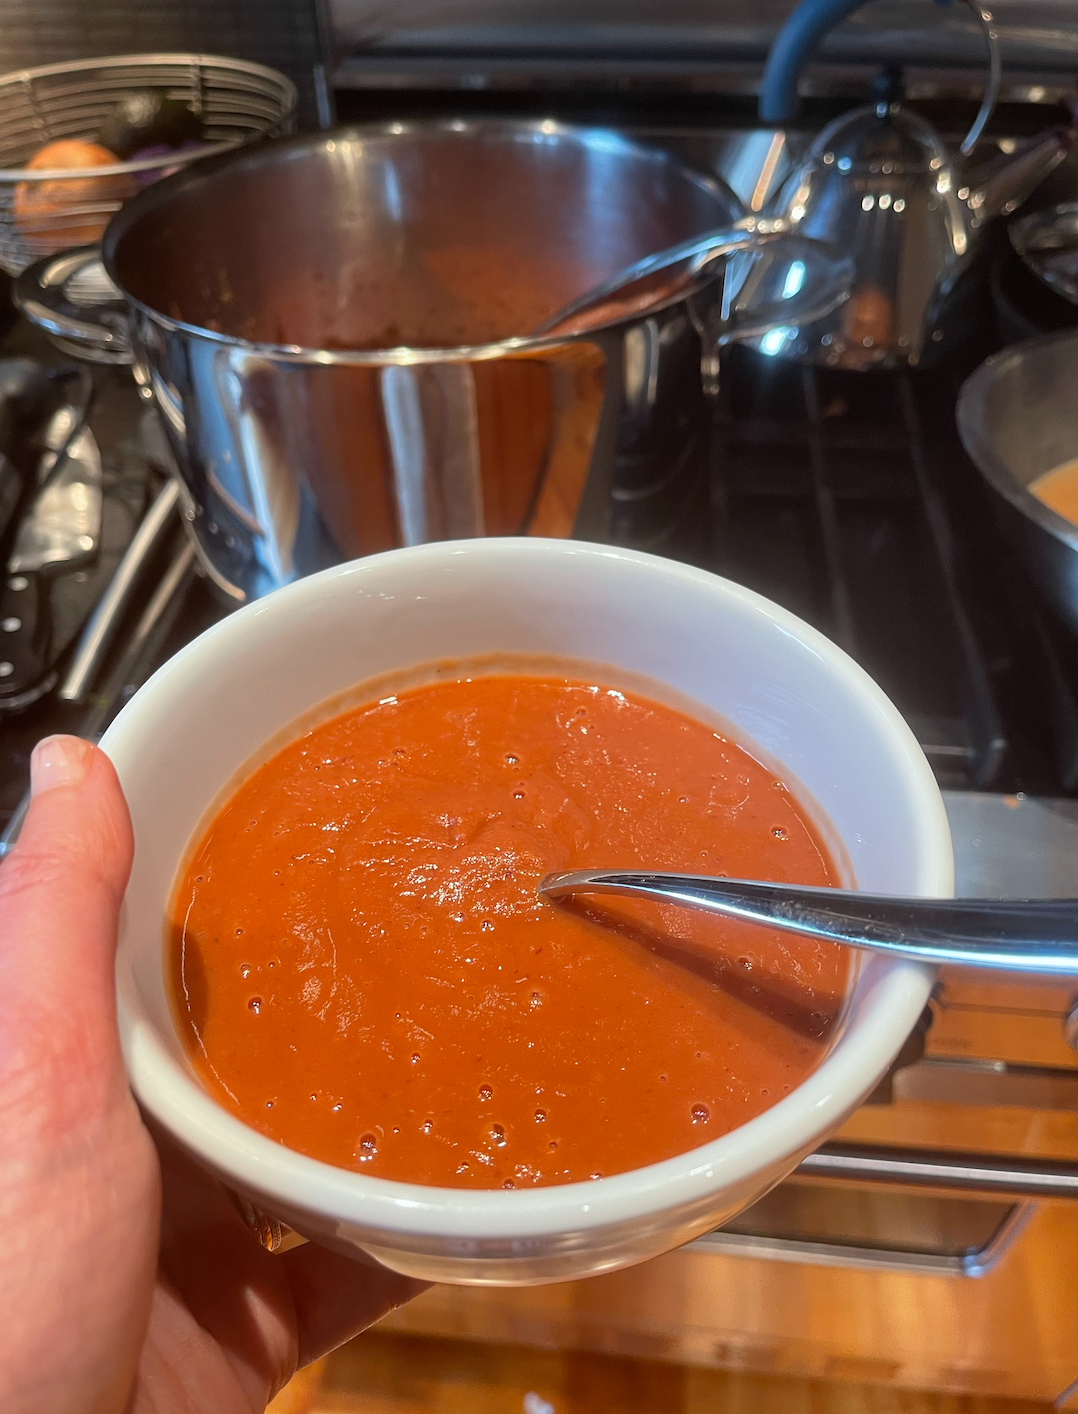
  2. Place everything in a blender or food processor and blend until it is a thick liquid. Notice the beautiful color and interesting texture of the sauce. What comes alive for you here?

  3. Heat a frying pan on medium heat. Add the blended ingredients plus the 3/4 cup of stock. Let the sauce simmer and thicken with flavor. Taste this dish and sprinkle in some salt or any other spices that your intuition or taste buds are calling for.

  4. The salsa roja sauce thickens in about ~5-10 min. While this is happening, take the opportunity to make your fried eggs so the meal can be timed well. Remember, your eggs don’t have to look like an instagram picture to be delicious and perfect for your meal.

  5. When the sauce has thickened, you will add the handfuls of tortilla chips and evenly coat in the pan. Turn the heat off and top with your fried egg(s) and any other topping your heart and body crave.

  6. Enjoy the savory, crunchy and comforting layers of this dish. Notice what part of your senses light up. Does your mouth start to water? Do your hands want to jump right in? Lovingly and curiously pay attention.

Cauliflower Parmesan Bites

I stumbled on creating this recipe a few weeks ago when heading to a friend’s house for dinner and they asked if I would bring an appetizer. I am always a huge fan of bringing veggies for any sort of dish because in my opinion, we can never have too many vegetables! I see vegetables, no matter how they are cooked, as nutrients for our cells that give us more qi (energy). These delectable bites keep the snacking fingers, eyes, taste buds and body happy. They are also such a fun way to mix up our appetizer or side veggie game.

Ingredients:

  • Whole medium/large head of organic cauliflower or pre-packed cauliflower florets

  • 1 cup Italian bread crumbs (or gf bread crumbs of choice)

  • 1 tablespoon whole wheat flour (you can skip this step, but it helps make the breading stick)

  • 1/2 cup grated parmesan cheese

  • 1 teaspoon garlic powder

  • 1 teaspoon oregano

  • 1 teaspoon dried basil

  • 1/4 teaspoon salt

  • 1/4 teaspoon smoked paprika

  • 2 eggs

Directions:

  1. Pre-heat the oven to 400F. Prep a cookie sheet with parchment paper.

  2. Wash and prep the cauliflower into small florets. Make sure they are well dried. Notice the interesting shapes of the cauliflower. Notice the smells and textures.

  3. Combine all dry ingredients (breadcrumbs, seasoning, salt and cheese) in a medium bowl and evenly mix. Do you smell one spice stronger than the other? Notice if your mouth waters and craves a different type of spice—follow your instincts and add whatever you desire. Does this mixture create any memories or flashbacks for you?

  4. Beat the eggs together in a small bowl. Look at the color of the eggs. Notice how the yoke and albumen (white part) of the egg mix.

  5. Dip each floret into the egg mixture and lightly but evenly coat it.

  6. Gently roll the eggy cauliflower into the breadcrumb mixture so that the cauliflower is evenly coated with crunch.

  7. Place on the baking sheet. Repeat until each floret is complete.

  8. Bake for 15 minutes on each side. Make sure to flip so that they are evenly crispy and slightly browned.

  9. Serve with your favorite dipping sauce. I loved using tomato sauce or pesto.

  10. Mindfully enjoy each bite—sensing the crunch, flavors, smells, sounds and how it feels in your body. Notice as you enjoy these delectable bites, do you fingers want more, your eyes, your mouth, your heart, boredom or your belly.

The Best Kale Salad

This is one of the best kale salads I have ever made. It sounds dramatic, but it’s true and I was so impressed with how “restaurant quality” it tasted. In fact, this recipe is based on a delicious kale salad from a local Italian restaurant in Seattle called Il Corvo. This recipe takes a lot of time and care, but I promise it it worth it. A great recipe to batch cook for a bunch of meals throughout the week. Or a great recipe to make when you host or go to a potluck. This dish feels healthy, indulgent, comforting and inspiring all at the same time. Great to service as a main dish with toasted chickpeas or protein of choice. Or you can pair this with one of the soups, pizzas or pasta dishes in the nourish section.

Ingredients: (about 6 servings)

  • 3 bunches of dino kale (or Tuscan kale). Washed and finely chopped without the stems

  • 12 garlic cloves

  • 1/4 cup fresh parsley

  • 1/2 cup grated parmigano cheese

  • 2 tablespoons apple cider vinegar

  • 2 tablespoons fresh lemon juice

  • 1/4 cup good quality olive oil plus a splash of olive oil to massage the kale

  • 1/2 teaspoon salt

  • 1/4 cup toasted pumpkin seeds (you can toast raw seeds or buy toasted unsalted)

  • 3 tablespoons of golden raisins (optional)

Directions:

  1. Wash the kale and dry it really well. Finely chop the kale. The smaller the better.

  2. Place kale in a big bowl and massage the kale by using a splash of olive oil and 1/2 teaspoon of sea salt. Let it sit.

  3. Wash and chop parsley, removing the stems. Smell the herb come alive as you chop. Watch it stick to your fingers. Place it to the side.

  4. Peel 12 garlic cloves (keep them whole)

  5. In a small sauce pan or cast iron, place 1/4 cup of olive oil and the 12 garlic cloves. Cook the garlic on a very low eat for about 30 minutes. You are making garlic confit. Watch the garlic closely so that it doesn’t burn. This process fills the home with the delicious smell of garlic and it’s a beautiful mindfulness process to watch the cloves take different shapes and colors. It can also be interested to watch the mind or hands get impatient. See if you can breathe into that and notice your relationship to waiting and cooking.

  6. To make the dressing, in a food processor or magic bullet, add the cooked garlic and olive oil, parsley, apple cider vinegar, lemon juice, and parmigiano. Blend until everything evenly combines. The dressing will be thick, but if it feels too thick taste it and determine if it needs more vinegar or olive oil.

  7. Mix the dressing on the kale evenly.

  8. Optional to add more grated parmigiano n the top for a cheesier flavor.

  9. Top with toasted pumpkin seeds to give it a beautiful crunch. Optional to add golden raisins.

  10. Salt & pepper to taste.

  11. Enjoy eating it mindfully! Taste all of the flavors and textures.

Garlic Parsnip Carrot Mash

In the mood for something cozy, nourishing and hearty? Want a fun and wintery side dish? Try this recipe. I love making this as a complimentary side dish to roast chicken, lamb, steak or turkey. It is also great to eat with a fried egg on top (usually my go-to if I have leftovers).

Ingredients: (serves around 6 people)

  • 6 large carrots

  • 5 large parsnips

  • 3 garlic cloves

  • 1 tablespoon of Kerrygold butter

  • Olive oil

  • Salt & pepper to taste

Directions:

  1. Place a big pot of water on the stove top and bring to a boil. Add some salt to the water. Allow the water to boil with patience—notice the mind if it wants to hurry the process and bring yourself back to the present moment by connecting to your breath or the sensation of standing on your feet.

  2. Wash and peel all of the carrots and parsnips. Notice the smells of the vegetables as you peel. Does it evoke memories? Any physical sensations?

  3. Chop carrots and parsnips about inch thick. Remove the tops and ends. Notice the difference in texture from each chop.

  4. When the water boils, place thee carrots and parsnips in the boiling water. Cook for about 15-20 minutes, until the parsnips and carrots are completely soft. Usually the parsnips will take longer than the carrots so check the parsnips first.

  5. Drain the water and let the carrots and parsnips sit and cool to the side.

  6. Chop the garlic in any shape. If you like the garlic to disappear into the mash, make your chops smaller. I personally like slivers of garlic to come through the mash like little surprises in my mouth.

  7. Place the same pot back on the stove top on low heat. Add the butter and a splash of olive oil into the pan followed by the garlic. Notice the smell of the garlic—take note of how your mind and body react to the smell. Cook the garlic until it becomes translucent. Turn thee heat off and add the parsnips and carrots back into the butter/garlic pot. Stir evenly.

  8. Using an emersion blender or a masher, evenly blender everything together. Notice the sensation of steam, the smells, the sounds and the colors as your dish comes alive. Add salt and pepper to taste.

  9. Serve on a platter or in a bowl. Save leftovers in a container for the days ahead. You won’t regret it!

Butternut Squash Soup

Hearty warming soups are so cozy and nourishing for the body and soul. I love to stock my freezer with a big batch of this soup and defrost little jars for simple healthy lunches. This recipe is very simple, but requires some roasting time where patience is required.

Ingredients:

  • Medium butternut squash

  • 1 medium yellow onion

  • 16 oz vegetable or chicken stock (I used chicken stock for more of a buttery flavor)

  • 1/4 cup non dairy milk (I used oat milk)

  • 1 tablespoon olive oil

  • 1 tablespoon garlic powder

  • Salt & pepper to taste

Directions:

  1. Preheat the oven to 415F

  2. Skin the butternut squash and chop into 1 inch chunks. Remove any seeds (feel free to roast these separately…they are delicious with some salt and olive oil). Notice the bright beautiful color of the squash. Notice the texture while you chop.

  3. Chop the onion into any size and shape. Notice your relationship to onions as you chop.

  4. In a bowl or on a baking pan, mix the onion and butternut squash. Pour the olive oil, garlic powder and salt & pepper evenly on the ingredients.

  5. Roast the the onion and butternut squash until they are fully soft and browned. The browning helps awaken the sweetness.

  6. In a blender or using an immersion blender, mix all of the stock, cooked onions/squash and oat milk. Watch it become super creamy and luscious. Notice the smells and steam. Add additional seasoning to your liking.

  7. Store the soup in freeze safe jars and enjoy mindfully whenever you are wanting a comforting hug from the inside out.

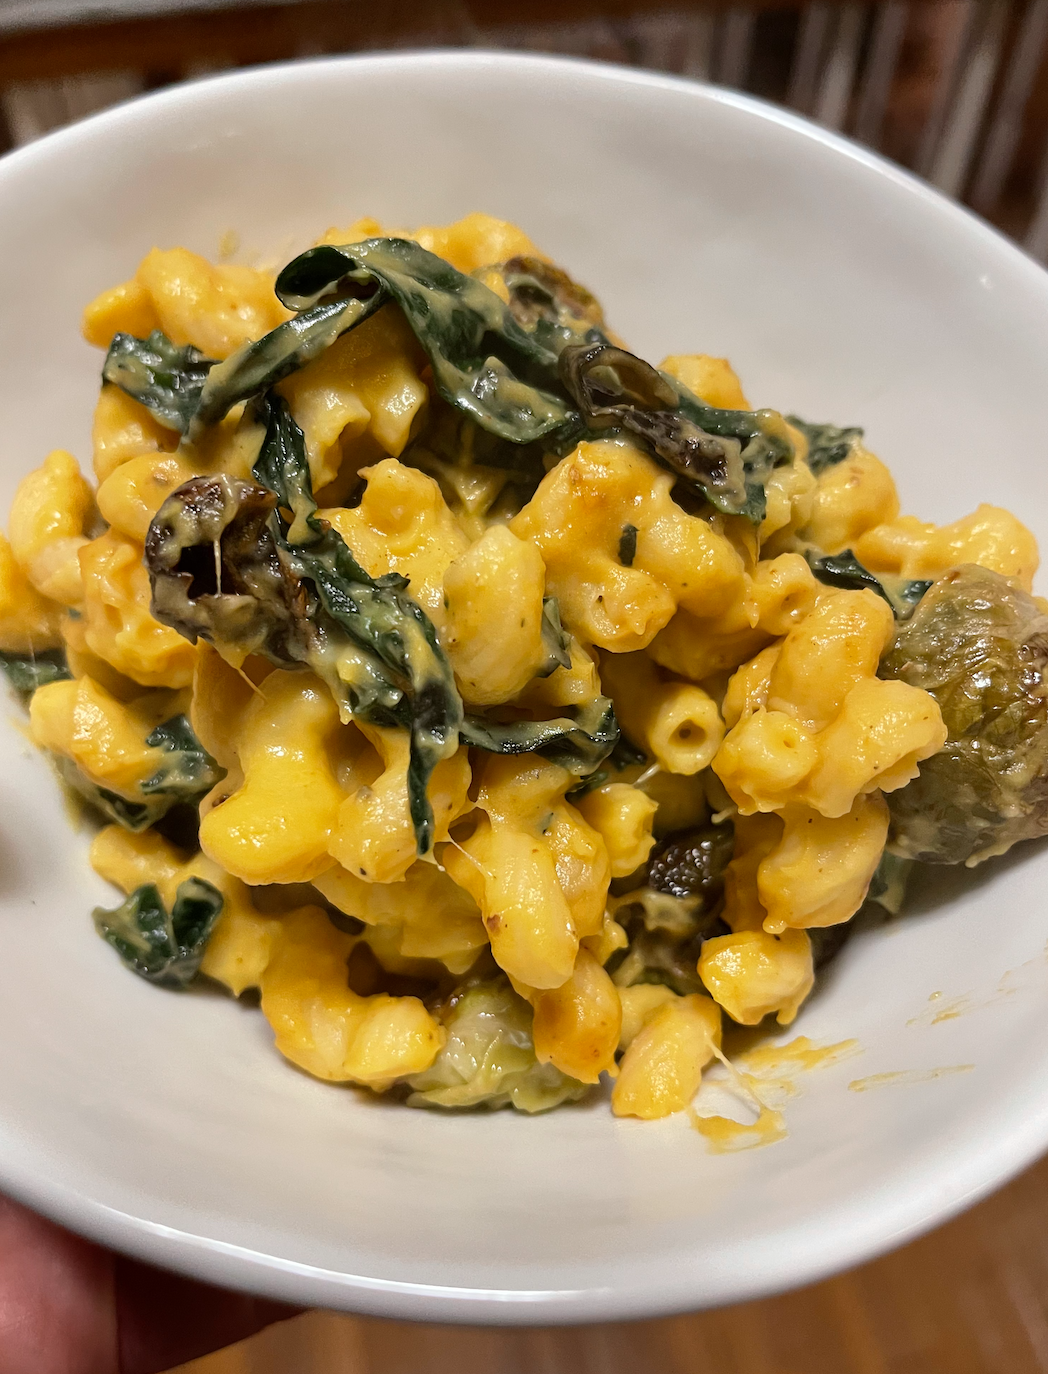
Cheesy Squash Pasta (aka vegan mac and cheese)

This is a fun fall and winter dish that feels cozy, filling, delicious and interesting. As always, give yourself full permission to make this recipe your own. Swap out the veggies for anything else you have in your house. Enjoy playing with the fall color pallet, textures and smells!

Ingredients:

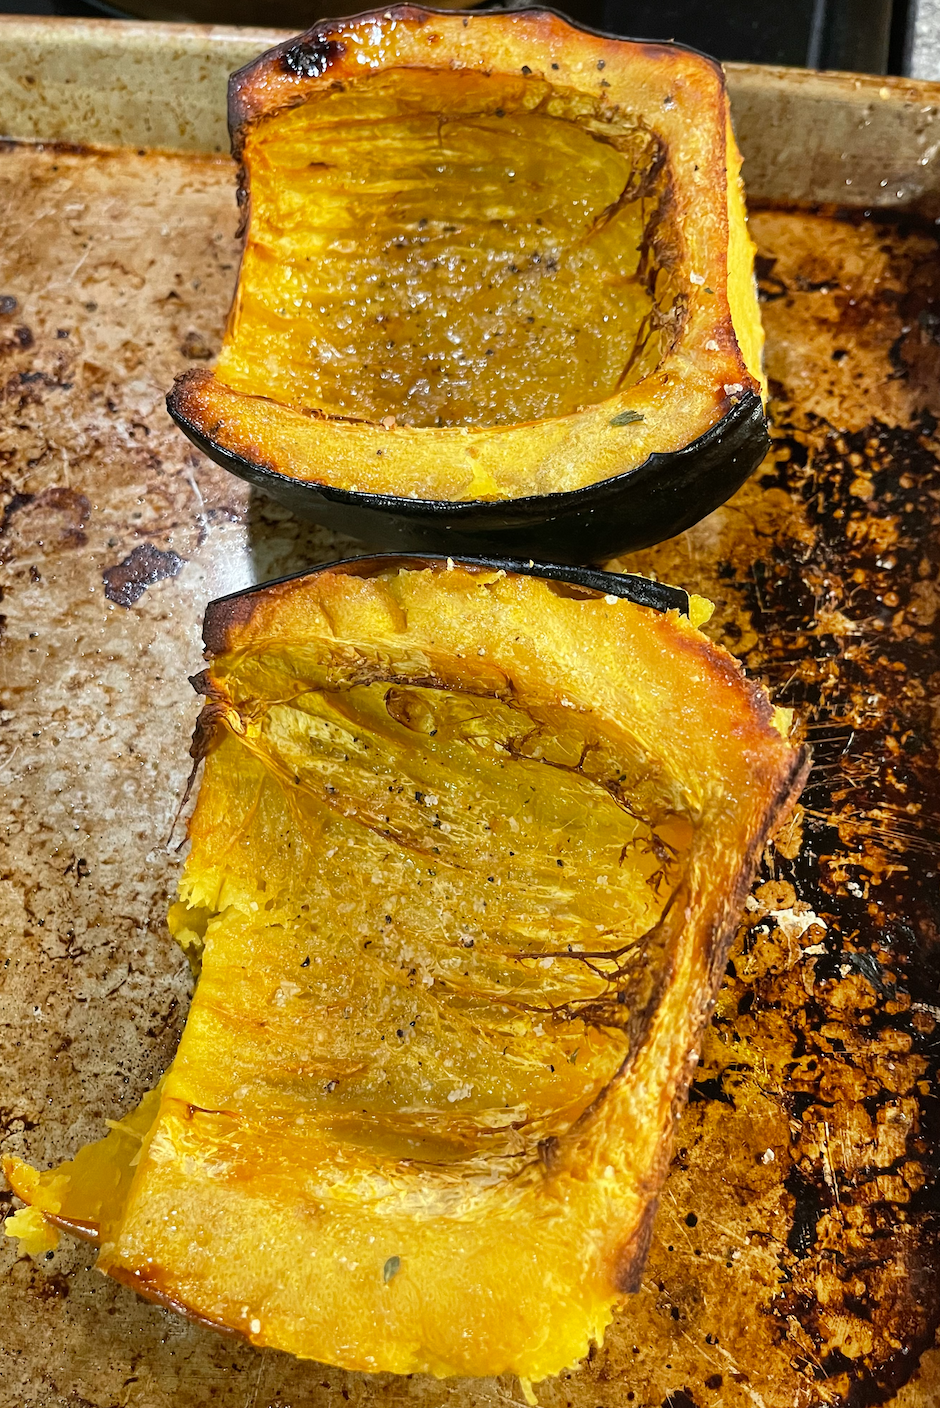
  • Small to medium acorn squash

  • Banza Pasta (pick any shape you like that will hold a thick sauce. I like this one)

  • Big bunch of kale

  • Brussel sprouts

  • half a yellow onion

  • 1 teaspoon garlic powder

  • 3 fresh garlic cloves

  • Salt & pepper to taste

  • Olive Oil

  • 1/2 cup of grated parmigiano (leave out if keeping this vegan)

  • 3 tablespoons of nutritional yeast

  • 1/4 teaspoon paprika

  • 1/2 cup of non dairy milk. I used coconut because it tends to be creamer

Directions:

  1. Preheat oven to 400F

  2. Prepare your veggies:

    1. Wash and slice brussel sprouts in half

    2. Cute the acorn squash in half and remove all of thee seeds with a fork

    3. Chop the onion in slices

    4. Wash, remove the stems and chop your kale into small pieces

  3. On a baking sheet, place the acorn squash facing up. Sprinkling olive oil, a little garlic powder and salt& pepper. On the other side of the baking sheet, mix the brussels and onions together and lightly drizzle olive oil, garlic powder and salt & pepper

  4. Meanwhile, boil a pot of water for the pasta and follow the directions on the back of the box. When the pasta is cooked, let it cool off to the side.

  5. Place the baking sheet in the oven for around 30 minutes for the brussels and about 45 minutes for the squash. You want to take the brussels out when they are crispy and fully cooked. The onions will be browned. You want the squash to be browned and very caramelized.

  6. While the squash cools, chop the fresh garlic and place in a pan with olive oil and add your kale. Saute until the kale gets fully cooked and crispy.

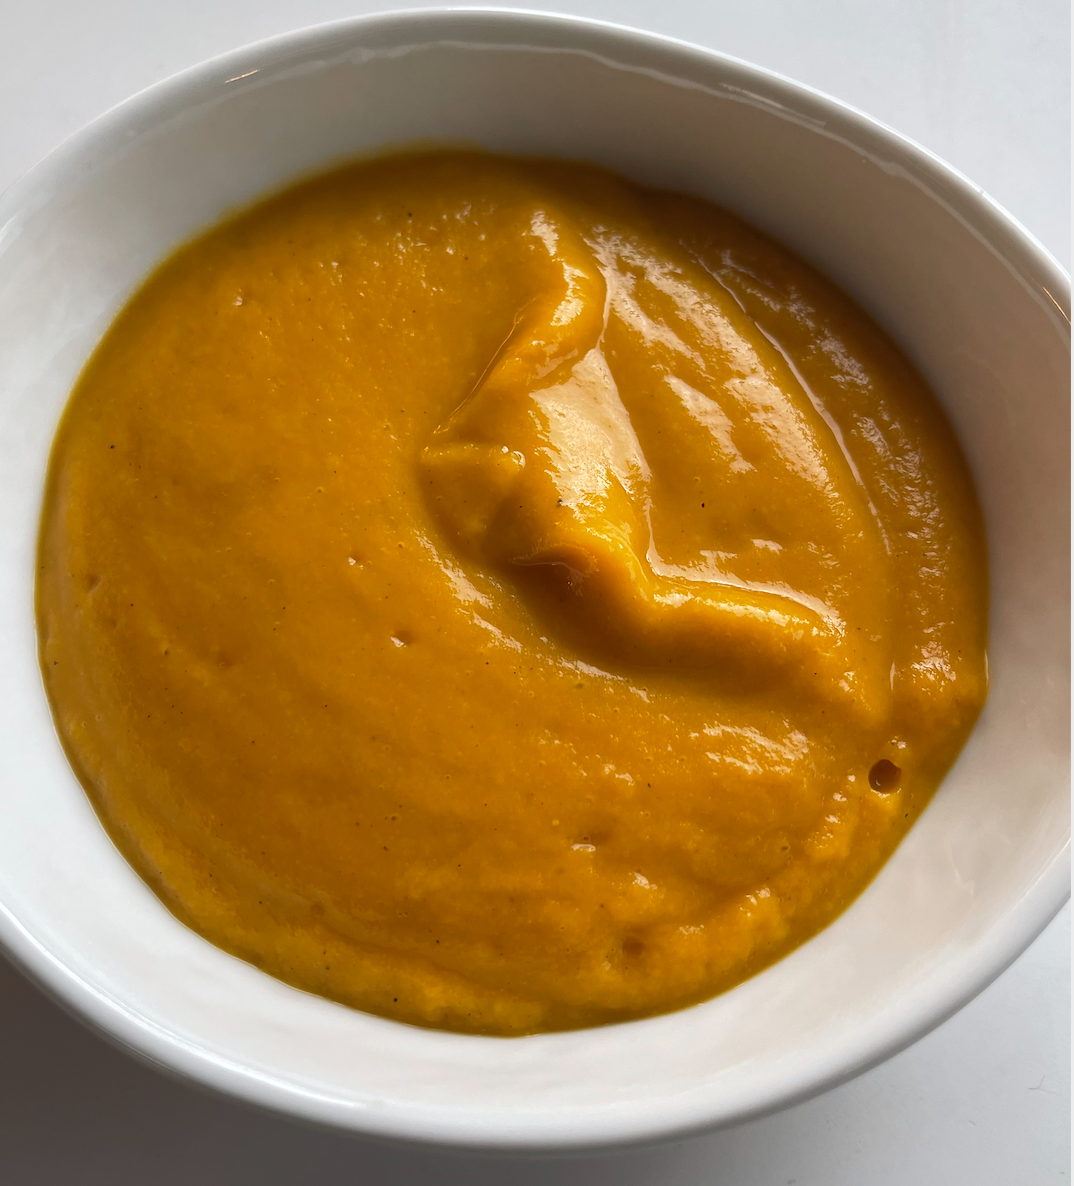
  7. Peel the skin off of the squash and place the insides in a blender. Add the non diary milk and 3 tablespoons of nutritional yeast. Blend until smooth. This will be thick, which is a good thing. You will see a beautiful bright color.

  8. In the empty pasta pan, add the cooked pasta, squash sauce, kale, roasted veggies, and paprika. Mix together as you add the parmigiano (if you are keeping this vegan, add more nutritional yeast for a cheesier flavoring).

  9. Add finishing pepper and salt adjustments to your liking

  10. Serve and enjoy mindfully! (Leftovers taste even better! So save any leftover in a closed container for a few days and enjoy).


Comforting Sweet Potato Soup

Ingredients:

  • 4 medium sweet potatoes (they can be any variety of yams, sweet potatoes, purple sweet potatoes etc)

  • 4 cups of veggie or chicken broth (learn how to make homemade veggie broth here)

  • Salt & pepper to taste

  • 4 fresh garlic gloves

  • 1 tablespoon olive oil or your favorite cooking oil


Directions:

  1. Wash and chop the sweet potatoes into rounds about 1/2 inch thick. As you wash the potatoes, notice the texture and variety of shapes.

  2. Smash and chop garlic. Notice the smell on your fingers and sense of the sticky sap.

  3. In a big pot, on medium heat, place the oil and garlic in the pot. Once the garlic becomes translucent and you can smell the garlic throughout your kitchen, place the potatoes in the pot and let them cook for about 4 minutes. This helps the sugars caramelize and offer more flavor. Can you smell it?

  4. Add 4 cups of broth and bring to a boil. Let the sweet potatoes cook for about 30 minutes. You want them to get very soft. Listen for the sounds of the pot water boiling and steaming.

  5. When complete, place sweet potatoes in the Vitamix with liquid or use an immersion blender to evenly blend ingredients in the pot. If you like your soup to have a lighter consistency, add more broth. If you like your soup to be thicker and more of a puree, keep as it is.

  6. Keep smelling the soup as you blend and taste along the way to determine how much more salt and pepper to add.

  7. You can serve this dish as is or top with pumpkin seeds avocado or a drizzle of high quality oil. This dish is yummy for a light dinner or lunch. You can serve it with a side salad or toast.

Simple Homemade Vegetable Broth

Broth is nourishing, healing, satisfying, nutritious, gentle on the body and oh so delicious to add more flavoring to any meal. Below is a simple vegetable broth recipe you can make with vegetable scraps from your very kitchen! It is so nice to know what you are actually drinking or adding into your dishes.

Ingredients:

  • Collect as many vegetable scraps as possible (onion layers, stems, carrot tops, garlic skins etc). Literally the end or scraps of any vegetables that you would place in the compost works! You can collect scraps and put them in a ziplock bag and place in the freezer until the bag is full

  • 4 fresh garlic cloves, bay leaves or any other seasoning you want

  • Salt & pepper

  • Tablespoon of olive oil

Directions:

  • Chop fresh garlic

  • In a big pot, heat oil and place the garlic in the pot until translucent. Then add all of the veggies scraps. Followed by enough water to just cover the veggie scraps

  • Salt and pepper as much as you want. Add bay leaves.

  • Let the veggie water boil for 30-45 minutes.

  • Drain the veggies and you are left with fresh and pure vegetable stock.

Cauliflower Steak

Screen Shot 2021-09-26 at 8.29.39 PM.png

Sometimes I crave veggies, but I want them as my main meal instead of as a side dish. Making cauliflower “steak” helps my mind and senses feel like I am eating a substantial “meaty” meal on those nights I want to keep it light yet satisfying. Cauliflower is a bland veggie in taste, but holds so much richness with the texture that you can get so creative with it. Follow your senses and intuition as you cook this nourishing dish.

Ingredients:

  • 1 head of cauliflower (rinse and remove the base of the stem)

  • 1 tablespoon garlic powder

  • 3 tablespoons olive oil

  • 1/2 teaspoon turmeric

  • Salt & pepper to taste

Directions:

  1. Place the oven on 400F

  2. in a skillet, place the head of cauliflower in the center and drizzle with olive oil. Evenly spread the seasoning all over

  3. Roast in the oven for 45-60 minutes (until the cauliflower reaches your desired texture. Cooking it longer will make the cauliflower softer)

  4. Slice it up and eat it like a steak, one mindful bite at a time

Quick Veggie Pickles

Screen Shot 2021-09-24 at 12.10.42 PM.png

I love making quick pickles because they are such a fun addition to a meal. I love adding them to salads, sandwiches, rice bowls, eating them as a snack or having them on hand for a great appetizer, when hosting.

Below is the typical pickling juice I use, but I switch up what spices or veggies I add depending on what I am craving, the season, or what genre the dish I am making is in.

Share your favorite spices and pickling recipes below in the comments!

Some of my go-to picking items:

  • Cucumbers

  • Beets

  • Red onions

  • Carrots

  • String beans

  • radishes

  • Grapes

Pause here and think about what type of food you want to pickle and why. Is it to match a meal? Are you craving a certain snack, texture or flavor?

Next, think about what pickle brine you want to create. What spices and flavors do you want?

Pickling juice ingredients (American /Mediterranean flavors):

  • 1 cup apple cider vinegar

  • 1 cup water

  • 1 tablespoon kosher salt

  • 2 tablespoons sugar (white or coconut sugar)

    My go-to spices:

  • 3 garlic cloves

  • 1-2 tablespoons mustard seeds

  • 1 teaspoon celery seeds

  • 1 teaspoon dill seeds

Pickling juice ingredients (Asian flavor):

  • 1 cup rice vinegar

  • 1 cup water

  • 3 tablespoons sugar (white or coconut sugar)

Directions:

  1. Wash out your glass jar container.

  2. In a pot, add the vinegar, water, salt, and sugar. Bring to a boil and make sure everything is dissolved.

  3. Meanwhile, prepare your jars by placing your desired spices on the bottom of the jar. Prep your veggies and pack them into the jar as tightly as possible. Think about how you’d like the veggies to be cut. For instance, cucumbers taste differently when they are cut thinly or cut into thick long slivers. Mindfully check-in what best fits your intention. (Keep in mind, the thinner you cut your veggies, the faster the pickling process will take.)

  4. Once the brine boils, pour the brine in the jar over the veggies and save about 1/2 inch of space at the top.

  5. Close the jar and gently shake the pickle jar so that the herbs and flavors mix.

  6. Let the jar get to room temperature before placing it in the fridge to “cook”.

  7. Mindfully wait 2 hours before opening them up. Leave over night for a deeper richer flavor.

  8. Mindfully enjoy each flavorful bite!

Homemade Bagels (GF)

Screen Shot 2021-03-08 at 8.22.39 PM.png

I am a New Yorker so I am picking and particular about my bagels. I am not GF, but when I stayed with my sister and her husband, he is GF so this recipe was developed for someone with a gluten sensitivity.

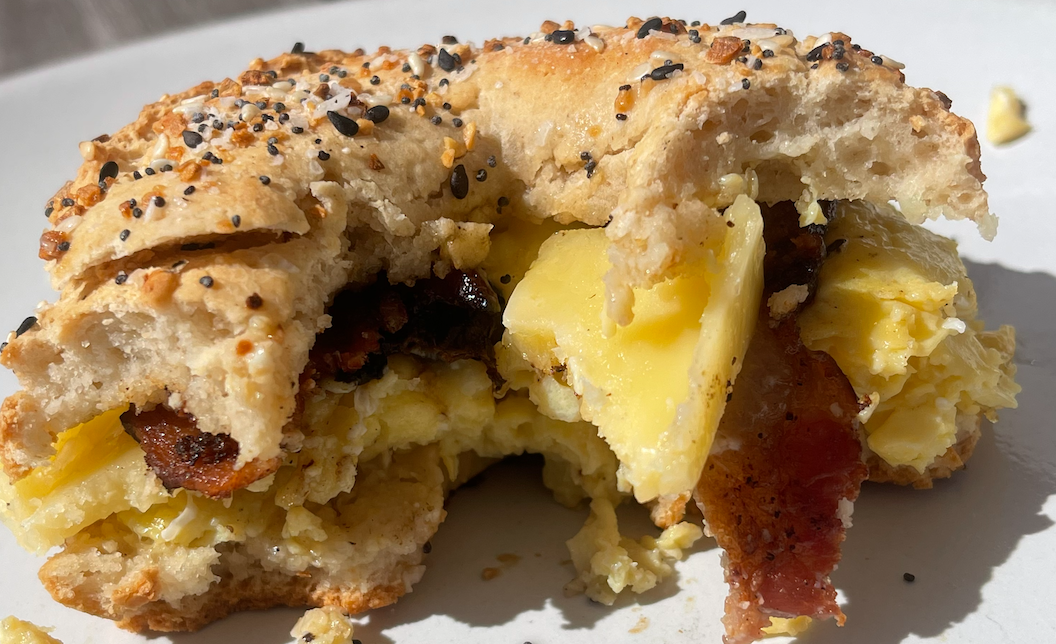
Let me just say, these didn’t taste gluten free and were probable the best gluten free baked item I have ever had. Enjoy these bagels with eggs and beacon, PB&J, butter & jelly, turkey, cream cheese … whatever your heart desires.

Ingredients:

  • 1 cup King Arthur GF Flour (or 1 cup regular flour)

  • 2 teaspoons baking powder (freshly opened)

  • 1 cup Fage greek yogurt (full fat and no liquid)

  • 1 egg (beaten and used for the top of the bagel)

  • Trader Joes Everything bagel seasoning

Directions:

  1. Preheat oven too 375F.

  2. Place parchment paper on a baking sheet

  3. Combine all ingredients in a bowl and mix until it crumbles (minus the egg)

  4. Remove the dough from the bowl and knead until the dough is not sticky anymore. Nothing should stick to your fingers.

  5. Divide the dough into 4 balls (or smaller to have mini bagels). Poke a hole in the center to make the bagel shape and stretch/smooth it out.

  6. Gentle spread the the egg wash all over the bagels and then sprinkle with your desired amount of bagel seasoning on both sides.

  7. Bake for ~25 minutes until lightly golden brown. Let them cool before cutting and serving.

  8. Enjoy these bagels mindfully! Freeze leftovers for easy access.

Screen Shot 2021-08-23 at 1.38.34 PM.png

Make Your Own Pizza

Screen Shot 2021-04-13 at 1.36.35 PM.png

Here are some of my favorite grain-free/gluten free frozen pizza doughs. Having some of these stashed in the freezer can be so helpful for those nights you want something easy, delicious and comforting. I sometime use pizzas as a way to clean and clear out the fridge. A fun vehicle for veggies!

Share your favorite pizza combos in the comments.

My top favorite crusts:

Favorite sauces:

Favorite Topping combos:

  • caramelized onions

  • sauted mushrooms

  • sauted spinach/chard/kale

  • prosciutto

  • roasted fennel

  • sausage

  • mozzarella

  • Feta

When you create you combo, see if you can explore what balance of flavors sound good to your taste buds and body while taking into account what ingredients you have to work with. You can’t go wrong here!

Avocado Toast

Screen Shot 2021-08-12 at 1.40.34 PM.png

Avocado toast might just be one of the most comforting and healthy meals for me. You can obviously do no wrong when making avocado toast. I think this meal becomes a great canvas for nourishing creativity. I love making these versions for breakfast, lunch or for a hardy snack.

Below are some of my favorite avocado combos, but I’d love to hear how you make yours! Share in the comments below.

  1. Avocado Toast with Hemp Seeds (shown in the photo)

    Ingredients:

    • Sprouted Ezekiel Cinnamon Raisin Toast (my fav bread! I eat it with everything)

    • 1/4-1/2 a ripe avocado

    • 1 teaspoon high quality olive oil

    • 1 tablespoon of hemp hearts (so good for you! They are loaded with lots of protein and omegas that we humans typically don’t get enough of)

    • Himalayan salt to taste

    • If I am feel spicy I had a tiny bit of sriracha

  2. Avocado Toast with a Fried Egg & Spinach

    Ingredients:

    • Sprouted Ezekiel Cinnamon Raisin Toast

    • 1/4-1/2 a ripe avocado

    • 1 teaspoon high quality olive oil

    • Fry an organic egg (I like to keep it soft and runny)

    • Handful of organic fresh spinach

    • Himalayan salt to taste

    • If I am feel spicy I had a tiny bit of sriracha

Refreshing Summer Quinoa Salad

Screen Shot 2021-07-26 at 1.43.15 PM.png

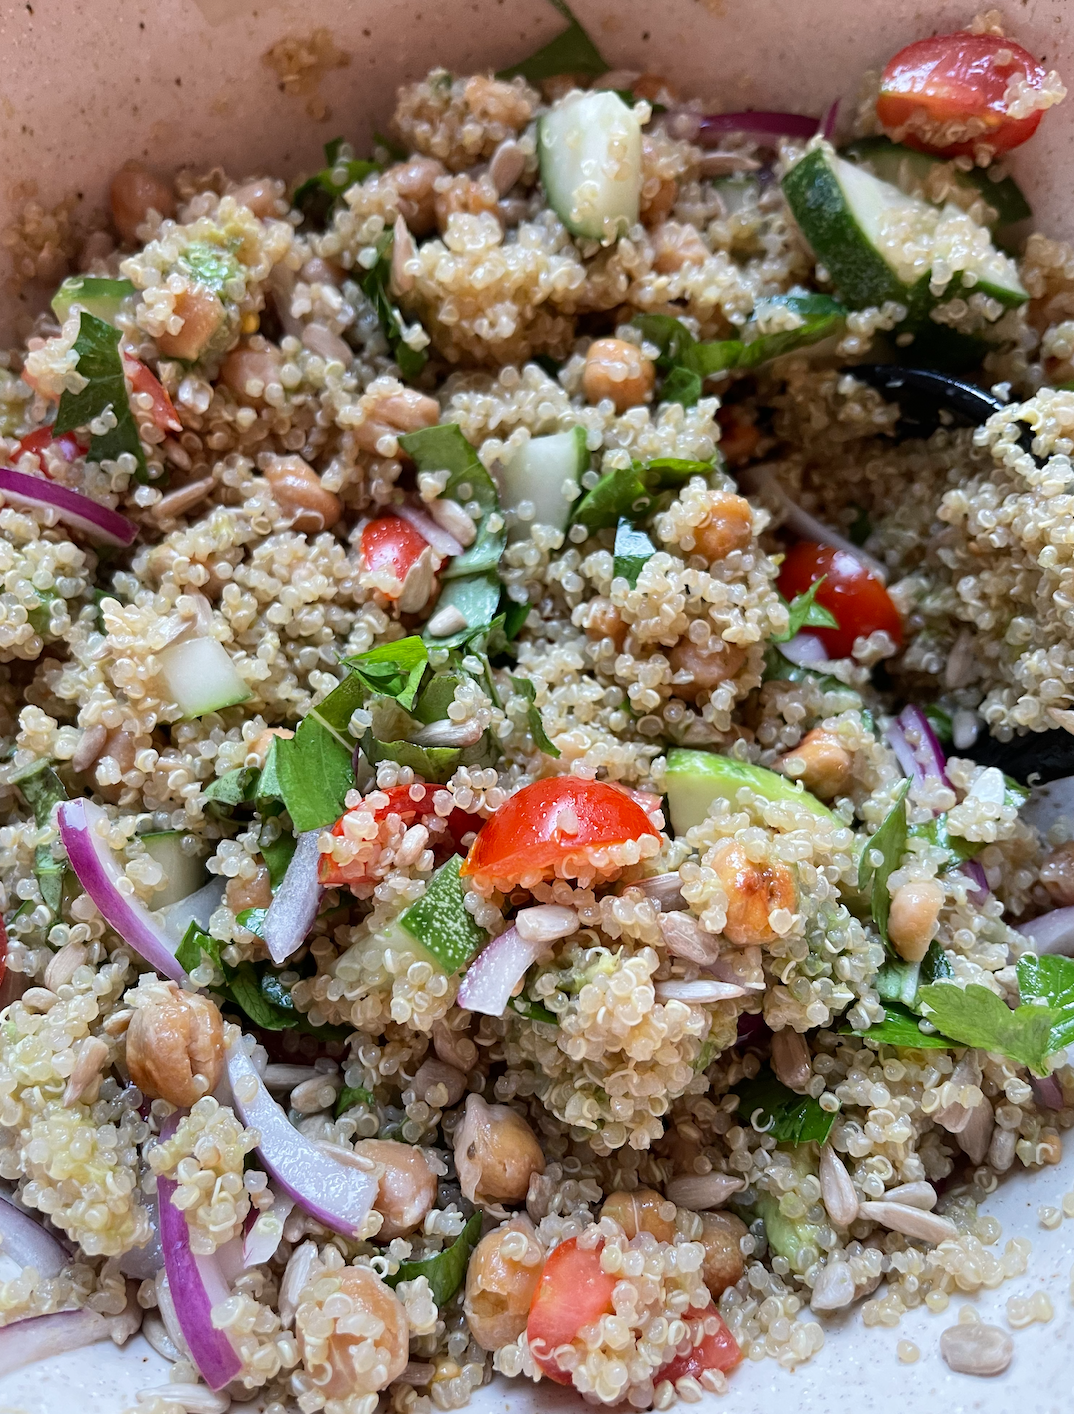
This quinoa salad is a great staple to batch cook so that you can have something easily and healthy at your fingertips for lunches or dinners. This recipe is also great to bring as a potluck menu since it is vegan and gluten free. I love making this dish and paying attention to all of the colors, textures, smells and flavors. As always, you have permission to make this recipe your own. Play around with different combinations and seasoning.

Ingredients:

  • 2 cups dry quinoa

  • 1 whole cucumber chopped in 1/4 pieces

  • ~10 cherry tomatoes sliced into 1/4 pieces

  • Handful of parsley and basil, washed and finely chopped

  • 1/2 medium red onion, thinly sliced into 1/4 inch pieces

  • 1/2 a large avocado chopped

  • 1 whole lemon juiced

  • 1 16 oz can of organic chick peas

  • 1/4 ish cup of high quality olive oil

  • 1 tablespoon garlic powder

  • 1 teaspoon coriander powder

  • 1/4 cup raw sunflower seeds

  • Salt taste

  • (adding feta cheese would also be a delicious addition)

Directions:

  1. Make quinoa following the instructions on the bag. Let the quinoa get fluffy and when it’s complete, let it fully cool to room temperature before mixing in the ingredients

  2. Drain and rinse the chick peas. Place on a cookie sheet and sprinkle with garlic powder and coriander. Roast in the toaster oven or oven on 400F for 15-20 minutes until the chickpeas are crunchy

  3. Wash and chop all veggies and fresh herbs. Place to the side

  4. In a big bowl, combine all vegetable and herb ingredients. Stir with lots of love as you fluffy everything around. Drizzle in the olive oil and lemon juice and continue to mix evenly. Then salt to desired taste.

  5. Let it sit for about 30 minutes in room temperature so the flavors have time to mix

  6. Enjoy each bite mindfully and store any leftover in the fridge for 2 days in an airtight container


Portobello Pizza

Screen Shot 2021-07-08 at 9.01.31 PM.png

This is a fun and light meal that has so much flavor. You can get as creative as your mind wants with swapping out pesto for other sauces, adding different toppings or exploring what other cheeses taste like melted on top. There is no wrong way to make this portobello pizza so have fun tapping into what your body and taste buds are craving. I think doing a BBQ sauce, roasted chicken, spinach and red onion combo sounds delicious and like the next combo I want to try. Eating plant based gets to be delicious and nourishing.

Ingredients: (serving size is approximately one portobello mushroom)

  • One portobello mushroom for each person

  • 2 table pesto (store bought or homemade vegan pesto recipe here)

  • 3 mini mozzarella balls

  • 1 slice of prosciutto

  • 1 teaspoon olive oil

  • salt & pepper to taste

  • A few basil leaves for the topping

Directions:

  1. Heat oven or toaster oven to 400F

  2. Gentle wash the portobello with a wet paper towel so that it gets cleaned but doesn’t absorb too much water

  3. On a baking sheet, place the portobello face up (so that the stem is facing you). Gently sprinkle the olive oil, salt and pepper

  4. Bake for 15 minutes

  5. Keep the oven on while you remove the portobello. Gentle spread pesto evenly around the portobello. Tear the mozzarella up in smaller chunks and evenly spread around the top layer

  6. Bake for another 5 minutes until the cheese has evenly melted

  7. Take the portobello out and top with prosciutto and basil

Homemade Simple Tzatziki Sauce

0596DD2B-0E99-4846-B35B-8AAE1275D1F5.JPG

I used too be so intimidated by tzatziki that I would’t even try it! But it has become my latest favorite summer addition. You can do so many things with it! You can use it as a veggie dip, on wraps, with grilled meats or veggies.

Ingredients:

  • 1 cup of whole fat greek yogurt

  • 1/2 cup graded cucumber

  • 1 tablespoon fresh lemon juice

  • 1 garlic close finely chopped or grated (add a splash of garlic powder too if you want to increase the garlic flavor)

  • 1 tablespoon olive oil

  • 1 tablespoon finely chopped parsley

  • 1 tablespoon finely chopped mint

  • Dash of salt to taste

Directions:

  1. Use a cheese grater, grate 1/2 cup of cucumbers. Gentle wrap in a paper towel to squeeze out the extra water. Place grated cucumbers in a bowl.

  2. Add yogurt and all of the other ingredients to the same bowl.

  3. Mix well and let the yogurt rest room temperature or in the fridge for 30 minutes before eating. This helps the flavors mix.

Tuna Salad

Screen Shot 2021-06-05 at 12.53.08 PM.png

I’m not going to lie….canned tuna use to gross me out! The smell, the liquid and the fact that it looks kinda like cat food always turned me off. However, I have learned to love it and cherish it for it’s deliciousness, versatility and ease. Having canned tuna stocked in the pantry is such a great way to make simple and healthy meals when fresh protein is not available. You can make simple and healthy lunches or dinners without feeling stressed you don’t have fresh food in the house. Canned tuna is also a great way to get creative and be a vehicle for emptying out the fridge. There is no wrong way to make tuna salad as long as you follow your taste buds and intuition. Below is one of my go-to version to make. You can make a tuna melt with it, create tuna wraps, lettuce wraps, place in a pasta dish or on a salad. Your options are endless!

Ingredients:

  • Canned tuna (I usually use Trader Joe's Albacore Solid White Tuna in Water)

  • 1 pickle slice

  • 1 celery stock

  • 1/2 avocado

  • 2 tablespoons wholegrain mustard

  • 2-3 tablespoons red wine or apple cider vinegar

  • 1 teaspoon worcester

  • Splash of olive oil

  • Salt & pepper to taste

Directions:

  1. Open the can of tuna and drain out the water. Place the tuna in a bowl

  2. Dice celery and pickles into small pieces and add it to the tuna bowl

  3. Add the avocado and the remaining ingredients

  4. Mix everything together evenly

  5. Serve however you desire

  6. Save leftovers in an airtight container for the next 2 days

Share our favorite tuna salad combinations in the comments below!