Focus

Roasted Veggie Tacos

Tacos are a blank canvas for your creativity and nourishing pleasure. There is no wrong you can do (aka no judgments here). All you can do is think about what sounds good to you, place it in a toasted tortilla and enjoy mindfully!

I find it is so helpful to have a functional recipe like this on hand for those meals you want to taste good, be healthy, but don’t have much bandwidth to “make it fancy.” This recipe is also a great vehicle for leftovers. Something to keep in mind, just because we are having tacos, doesn’t mean it has to be seasoned with Mexican inspired spices. Use your intuition to guide you as you build your tacos. Use the recipe below for more inspiration and mindful cooking guidance.

My favorite tortilla brands (all are gf):

Ingredients: (Recipe is for around ~8 tacos)

  • Tortillas of your choosing

  • 3 different types of veggies for roasting.

    • My go-tos:

      • 1/4 of a large head of red cabbage

      • whole head of cauliflower

      • 1 large sweet potato or 2 medium

  • 1/2 of yellow onion sliced

  • Beans of your choice (ie. one can or 2 cups of freshly made black beans, kidney beans, white beans, garbanzo beans or hummus)

  • Garlic powder, salt & pepper for seasoning the veggies

  • Favorite salsa (topping)

  • 1 ripe avocado (for topping)

  • Olive oil

  • Optional: Cheddar cheese (or sub feta or any other favorite cheese. If going vegan, you can sprinkle some nutritional yeast on your finished product or your favorite vegan cheese)

  • Optional: fresh tomato slices and lettuce to top at the end for some fresh crunch

Directions:

  1. Set the oven to 400 F.

  2. As the oven heats up, wash and prep your veggies. As you wash each vegetable under running water, take a moment of gratitude for this vegetable and all of the miles it has traveled to be right here. Thank the farmers, the sun, the nutrients in the soil for gifting this beautiful vegetable that is in your hands. Appreciate the color, texture and nutrients.

  3. Dry off the veggies with a clean rag, paper towel or shake them well to air dry.

  4. Cut the cauliflower into small florets ~1 inch - 1.5 inches. You can use the stems as well, cutting the same size. Notice the bumpy texture of the cauliflower. Notice any memories that arise. Smells? Place off to the side to keep drying.

  5. Slice about 1/4 of a large red cabbage into slivers. You want the slices to be ~1/3 of an inch. Not too small because they will get cooked too fast in the oven. Notice what thoughts arise as you chop. What’s your relationship to the color of the cabbage?

  6. Cube the sweet potatoes into 1/2 inch - 1 inch size pieces. With curiosity (not judgment), notice the difference in texture of the sweet potatoes versus the other vegetables.

  7. Slice up the yellow onion in small to medium slices. What’s your relationship to onions as you chop them. What memories or sensations does the smell evoke?

  8. Take a large baking sheet and drizzle some olive oil on the base of the band so there is a light layer. Next, sprinkle the veggies and onions on the tray like you are a painter splattering color on a canvas. It is ok if veggies are slightly stacked on each other, however you want them to have room to cook instead of steam. Notice the color, texture and size combination. What sensations arise in your present moment experience? Notice if you can make whatever you are feeling be OK. No need to judge.

  9. Sprinkle with salt, garlic powder and pepper. Use your senses to determine how much to use. Smell, see and feel. You can always add more while you cook or at the end of the roasting session. Sprinkle with a splash more of olive oil. Shake the tray to help move everything around.

  10. Place veggies in the oven and roast for 45 minutes, until the sweet potatoes are soft, the onions are slightly burned and caramelized and the cauliflower is browned.

  11. While the veggies cook, it is time to prep the beans. If you are using canned beans, open the can, rinse and drain them. Personally, I don’t love the slimy texture of canned beans so I put them in the oven, toaster oven or frying pan to “toast” them up. If you are using hummus no need to prep anything. Get curious, why did you decide to cook with this type of bean? What do you like about it?

  12. When the veggies are complete, let them cool. Notice how the colors and textures have shifted. What smell is alive in the kitchen?

  13. While the oven is still hot, but turned off (or in a separate toaster oven), place the tortillas with your choice of cheese. Notice the texture of the tortillas. The the color. Let the cheese melt and maybe get slightly bubbly. Notice if your body craves a lot of cheese or a little bit. Try to not judge what the body craves, just lovingly notice.

  14. While the tortillas warm, prep your toppings of choice. Slice the avocado into slices, mash it up or cube it. Play around with what tastes fun in your mouth.

  15. When the tortillas are ready, add a spoon full (or two or three) of your beans to the base. Follow by a big spoon full of veggies and topped with avocado and any other topping. Use as much salsa (and or hot sauce) as you like.

  16. Enjoy these little bundles of veggie love because in just a few bites they will magically be in your belly. Notice how it feels to eat with your hands and get a little messy. Notice how your body feels afterwards.

  17. Store leftovers veggies in the fridge and heat up for easy, quick and delicious meals throughout the week.

Miso Eggplant

Holy moly this dish is DELICIOUS and so comforting and beyond flavorful. I am typically not the biggest eggplant fan, but this dish is my favorite way to eat this vegetable. This is a great dish to make on it’s own served with rice/quinoa and or a great side dish to serve with salmon or any other protein.

Ingredients:

  • 1 whole large eggplant

  • 1 tablespoon sesame oil (for cooking the eggplant)

    Miso Paste:

  • 1.5 tablespoons of miso paste (I typically use white or brown)

  • 1.5 teaspoons sesame oil

  • 1 teaspoon soy sauce

  • 1 teaspoon rice vinegar

  • 2 green onions stalks finely chopped (optional)

  • Sesame seeds (optional)

Directions:

  1. In a small bowl, combine all of the miso paste ingredients and stir evenly. Chop the green onion and mix the white and light green part of the stems into the paste. Notice the smells and textures. Let this paste sit and “marinate” to the side while you prep the eggplant.

  2. Wash the eggplant and feel the texture of the skin. Notice your relationship to this vegetable (pleasant, unpleasant, neutral).

  3. Slice the eggplant down the middle vertically. Score each half of the eggplant by using a sharp knife and slicing vertical lines in one direction and then the other direction so that you are creating diamond shaped sizes. Notice the texture of the eggplant under the knife. Notice your thoughts. Are they judging the way you are cutting? Are they present and curious? Are they concerned with doing this “right”? The purpose of these cuts is to help cook the eggplant evenly and absorb the sauce later on.

  4. Place the over on 400F and allow it to heat up.

  5. While the oven heats, in a large cast iron or non stick frying pan, place on medium to high heat. Once hot, add the 1 tablespoon of sesame oil. Place the eggplants face down and sear for 2 minutes until lightly browned. Notice the sounds and smells that arise. How does your body respond?

  6. Flip the eggplant so the skin faces down now and turn the heat to medium. Place a lid on tip for 3-5 minutes so that the eggplant lightly steams. You want the eggplant to feel tender.

  7. On a baking sheet, place parchment paper down and place the two eggplant halves facing up (scored side up). Gently brush the miso paste all over the eggplant—letting it soak into the cuts you created. Notice the smells and colors as they unfold. Place this in the oven for 15 minutes. Notice the smells from the oven filling your home.

  8. After 15 minutes, put your oven on broil for 5 minutes, watching closely so that the eggplant doesn’t burn. You will see the miso paste caramelize and get a little bubbly.

  9. Remove from the oven and top with the remaining darker green onion slices. If you’d like, sprinkle with sesame seeds for more texture. Serve warm and mindfully enjoy each bite as it melts in your mouth.

Farmers Market Pesto (vegan)

Enjoy all of the nutrients of fresh ingredients you can get at the farmers market blended into one delicious and simple sauce. Getting fresh produce from farmers markets or even your own garden can produce a lot of extra greenery and goodness. For instance, carrot tops or beet greens. This greenery isn’t waste! It can be used for delicious sauces (or smoothies) that are full of nutrients like vitamin C and K. This pesto sauce is delicious to have with meat, on toast, veggies, eggs or on your pasta.


Ingredients:

  • 1 cup carrot top greens (washed and with the stems removed)

  • 1 cup of washed greens (lettuce with gentle flavors like romaine, spinach, mixed greens, beet green tops etc)

  • 1 garlic clove chopped

  • 1/2 cup of cashews (and or walnuts or sunflower seeds)

  • 1/2 teaspoon sea salt

  • 1/2 teaspoon garlic powder

  • ~1/2 teaspoon ground black pepper

  • 1/2 cup organic virgin olive oil


Directions:

  1. Wash and prep the carrot tops and greens. Feel the energy that is present in the fresh veggies. Take a moment of gratitude for the earth that grew these goodies. The farmers who picked them and for the ability of these nourishing vegetables to be in your hands and entering your body.

  2. In a food processor, add all of the ingredients and our the olive oil in last.

  3. Blend evenly for a few minutes. Connect to your senses. Watch the shade of green that unfolds. Notice the smells. Do certain memories come to mind? Notice if your taste buds water thinking about what you get to eat this with?

  4. Store in an airtight jar in the fridge up to a week or freeze and use for a different time.

  5. Enjoy eating this sauce mindfully. Can you taste the natural and simple ingredients? How does it make your body feel?

Raw Brownie Goodness

You know when your body craves something sweet and chocolaty, but you don’t want to feel like shit after eating it? I got your back. This raw brownie recipe is so delicious. It satisfies that chocolate craving without any refined sugars. The texture is both chewy and crunchy so the tongue and teeth have something fun to do while the body enjoys.

Ingredients for brownie batter:

  • 20 medjool dates (seeds and stems removed)

  • 1.5 cup of your favorite nuts/seed combo (ie. raw walnuts, almonds, cashews, pumpkin seeds etc…whatever you like or have at home)

  • 1/2 cocoa powder

Ingredients for frosting:

  • 3 tablespoons melted coconut oil

  • 1/4 cup maple syrup

  • 1/3 cup cocoa powder


Directions:

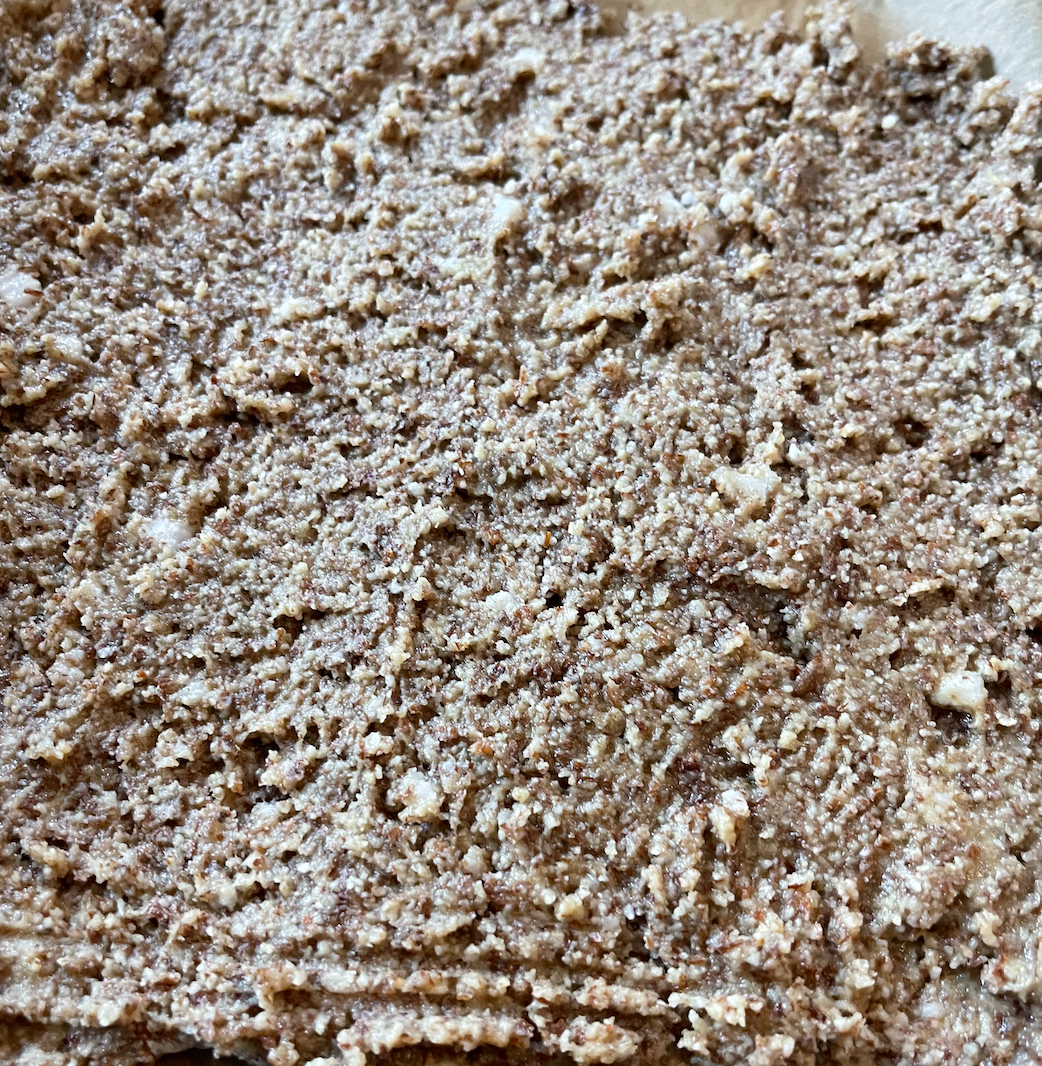
  • In a food processor, add the nuts/seed mixture plus cocoa powder. Blend until it creates an evenly mixed “dusty” looking combo. Notice the colors and shapes of the tiny nut pieces.

  • Add the pitted dates and process until the dough starts to naturally ball up. Notice your relationship to the raw dough.

  • Line a brownie pan (around 8X8 but it can be whatever size you have or would like) with parchment paper. Place the dough in the pan and use your fingers to evenly spread the dough out across the pan. If your pan is bigger, keep in mind the thickness you desire for a brownie. Do you want thinner or thicker textures when you bite into a brownie? I like them about 1/4-1/2 inch thick. Notice how the dough feels under your fingers and nails. What smells come alive for you?

  • Next, it is frosting time! Melt 3 tablespoons of coconut oil in the microwave in a microwavable safe bowl.

  • Add cocoa powder and maple syrup to the coconut oil and stir to evenly combine. Notice the texture that develops. Notice the smells and colors.

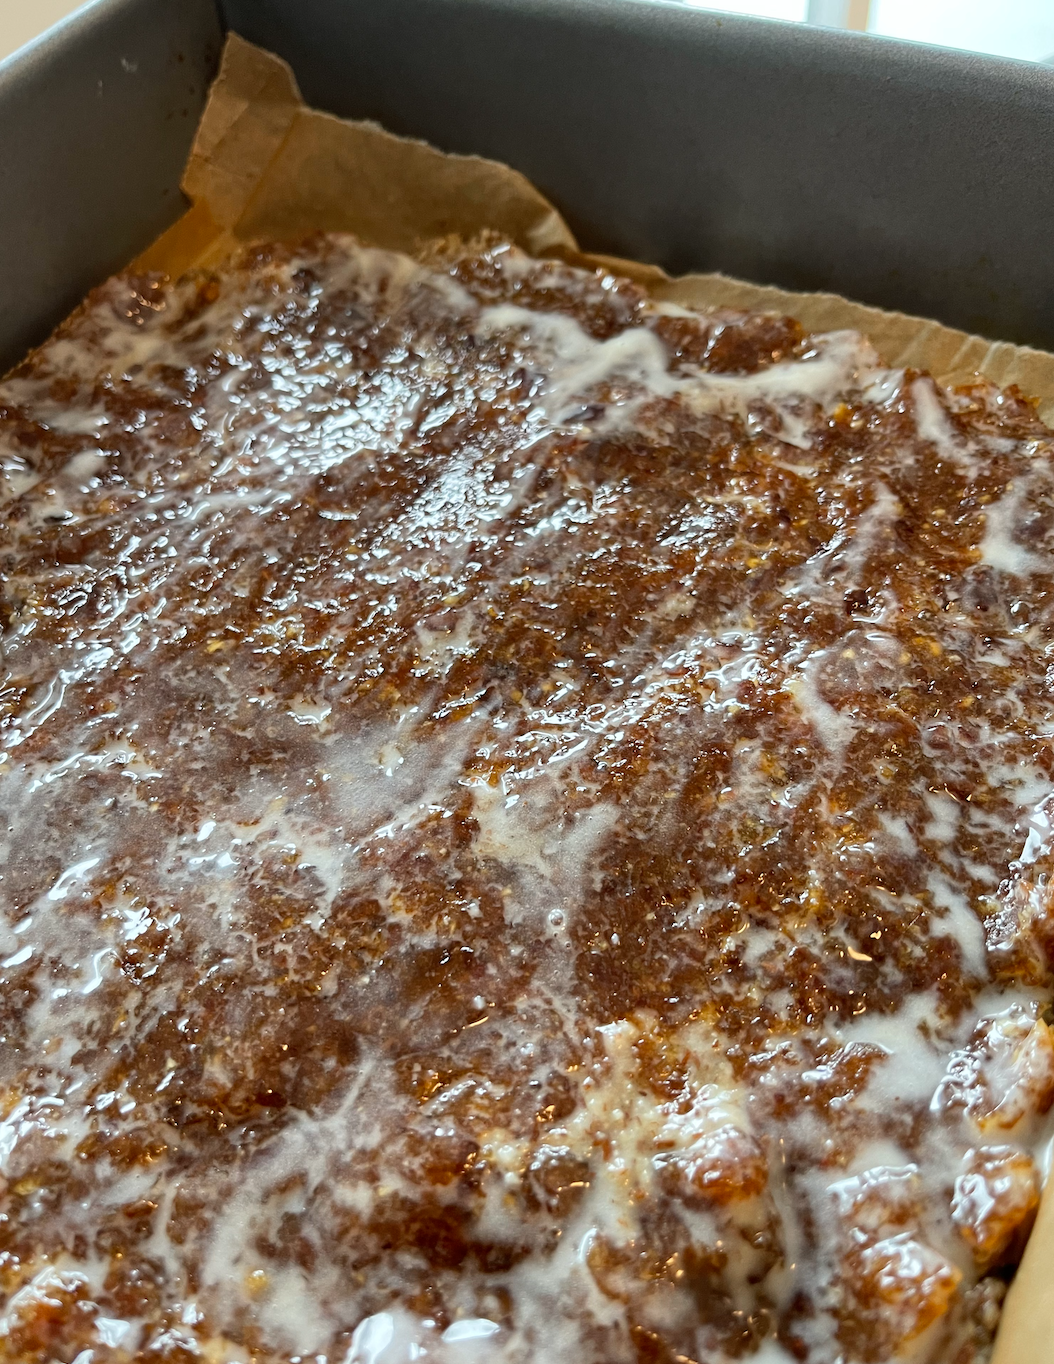
  • Pour the frosting over the raw brownie batter and evenly spread with a spoon or spatula.

  • Put in the freezer for 30 minutes and patiently wait. Notice what happens in your body as you wait. Does your mouth water? Do your hands get board? Does your mind jump to the next thing you can focus on?

  • Cut into your desired shape and sizes and enjoy eating them mindfully!

  • You can keep them stored in the freezer or fridge. Personally I like the freezer because the frosting creates a crunchy texture that is pleasant in my mouth.

Herb Crusted Whole Roasted Chicken

A whole roasted chicken might seem intimidating, but in my opinion, it is one of the simplest and sophisticated “best bang for your bucks” type of meal you can make. Making a roast chicken for the week is a great way to have healthy meat protein on hand for easy salads, tacos or sandwiches. This is also a great meal to make for one or when hosting because it feeds a lot of people and it’s so comforting.

Ingredients:

  • Whole organic chicken (~4-5 lbs)

  • ~2 lemons

  • 5 garlic cloves

  • Fresh or dried herbs (ie. few fresh rosemary sprigs, 6 sage leaves, a few sprigs of thyme)

  • ~2 tablespoons olive oil

  • Salt & Pepper


Directions:

  1. Turn the oven onto 400F and make sure the oven racks have enough space to fit your chicken.

  2. Wash the chicken and remove any insides from the chicken. It is a helpful practice to thank the chicken and send gratitude as you wash and prepare it. Notice what emotions or thoughts come up for you as you prepare animal food. Pat the chicken dry and place on a roast rack or deep pan. (make sure to disinfect your sink/counter to remove any contamination from the raw chicken).

  3. In a food processor, add the garlic and herbs so that they blend evenly (no chopping needed). Make sure you remove the herb stems. Notice the variety of smells that come alive. Which smells stand out the most to you? Do you prefer one herb flavor over the other? If so, feel free to adjust the quantity.

  4. Use about ~2 tablespoons of olive oil and hydrate the chicken. Squeeze lemon juice on the chicken and place the rinds inside the chicken cavity. This helps flavor and keep the chicken moist. Generously salt the chicken all over. The salt helps to tenderize the chicken. Use your hands to rub the herb mixture all over the chicken. Notice the texture of the skin and herbs beneath your fingers. (I like to visualize giving the chicken a little “love massage”).

  5. Place the beautiful chicken in the oven and let it cook for 60-90 minutes (depending how big the chicken is). The skin will be browned and the smells will be alive in the kitchen. To make sure the chicken is cooked properly, use a meat thermometer and it should be ~ 165- 175F.

  6. Let the chicken rest and cool for 10-15 minutes before slicing and serving. Notice what it feels like to practice patience. Do the fingers or eyes want to take a nibble? Does the mouth water? What is your body telling you in the moment?

  7. Enjoy eating this meal mindfully. Notice how it feels in the body. Is it calming? Soothing? Energizing?

  8. Store in the fridge up to 5-7 days.


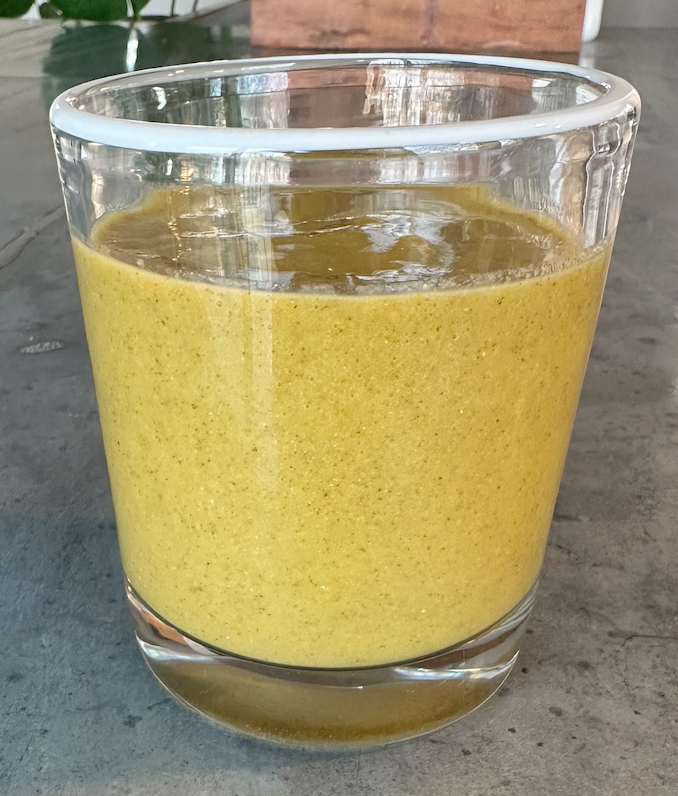
Debloat Papaya Smoothie

I have a deep love for papaya. Not only does it taste delicious, but it is great for you! This beautiful and funky looking fruit is full of vitamin C, vitamin A and has enzyemes that aid in digestion and debloating. Check out more of papaya’s benefits here. This smoothie is a great way to enjoy a nutrient dense meal that tastes yummy while giving extra love to your digestive track. Smoothies are also a great opportunity to get creative and practice mindful cooking by listening to your intuition on what to add or subtract.


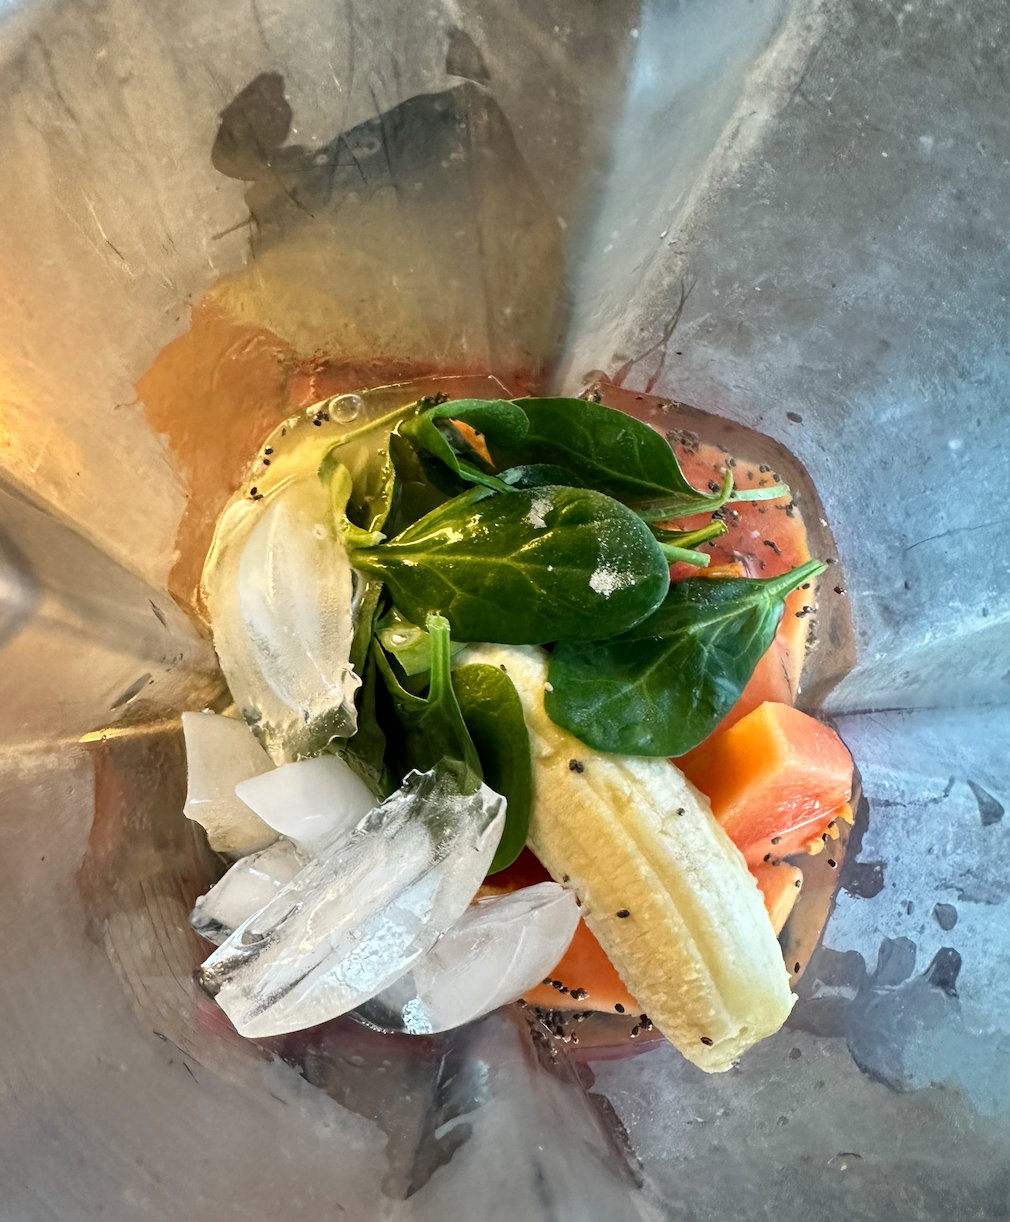
Ingredients:

  • 1.5 cups of cubed papaya with the skin and seeds removed

  • 1 medium banana

  • 1 tablespoon chia seeds

  • 1 cup fresh organic spinach

  • 1 serving of collagen poder of choice

  • 1/4 teaspoon turmeric

  • Splash of black pepper (this helps the inflammation benefits of the turmeric get absorb in th body)

  • 1 teaspoon organic raw honey

  • handful of ice

  • 1 cup of water


Directions:

  • Add alll of the ingredients into a blender. Notice what your senses are telling you. Are you more excited for one ingredient over the other? Do you have any strong emotions about the ingredients? What signs or sensations did you experience before makinng this smoothie that inspired you to make it? Did your intention wannt you to add anything else?


Mindfully enjoy sipping on the smoothie. Let us know how it tastes in the comments below.

Vegetable Lasagna

This dish are what dreams are made of…so damn good!

I love a good veggie lasagna that feels abundant with vegetables so that it can feel hearty and nutritious without feeling heavy. This is a great dish to make for so many reasons! One, you can freeze this easily into pieces so that you can have nutritious lunches/dinners on hand. Secondly, this is a great meal to make when hosting because it feeds so many people and doesn’t require too many dishes. Thirdly, this is our family’s go-to dish we make when supporting meal-trains. Have fun customizing and playing with your own lasagna creation because you can do no wrong here!

Ingredients:

  • ~16 oz no boil lasagna noodles

  • Your favorite tomato sauce. We use Q’s Homemade Sauce. About 16oz—more if you like your lasagna supper saucey.

  • 2 whole portobello mushrooms

  • 2 zucchinis

  • 3-4 cups of spinach

  • ~ 8oz fresh mozzarella (if you like your lasagna cheesier add more!)

  • 16 oz of Ricotta (you can use less if you aren’t into it)

  • 1 egg

  • 8 oz Pesto

  • Parmigiana (optional for serving)

  • Prosciutto (optional for topping after baking)

  • Basil for topping (optional)

  • Olive oil

  • 1 tablespoon of balsamic vinegar

Directions:

  1. Use you intuition on what type of veggie combo you’d like to bite into for your lasagna. Personally, I like the combo of portobellos, zucchini (or yellow squash) and spinach. Prep your veggies by washing them and slicing into thin layers. I typically cut my mushrooms bigger because I like them to taste “meaty”.

  2. Heat the over to 400F. On a baking sheet, place your chopped veggies and sprinkle with olive oil, salt and pepper. Leave the spinach off to the side. This will be added later. On the portobellos, splash with the balsamic to give it some extra flavor while it roasts. Cook for about 20-30 minutes, until the veggies reach your desired texture. I like them to have a slightly crunch because it gives it more texture in the lasagna and will continue to cook. Keep your senses open as the veggies cook—notice sounds and smells filling your kitchen.

  3. While the veggies cook, in a medium bowl, add the egg, ricotta, pesto and salt and pepper. Stir evenly. Notice the smells that come alive. What’s your relationship to the ingredients? What’s your relationship to the texture of the mixture? The color?

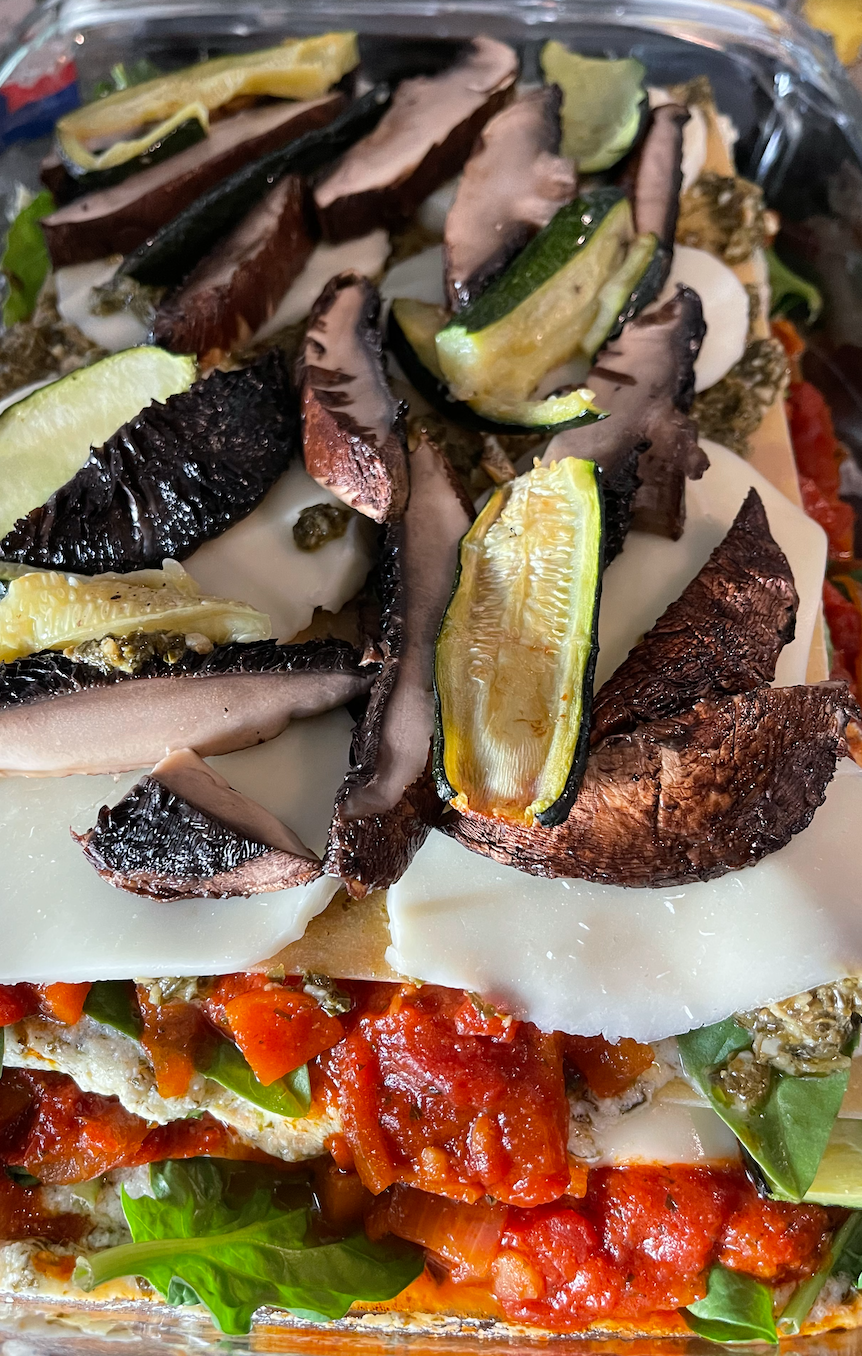
  4. In a big baking dish, sprinkle with olive oil and coat with a little bit of tomato sauce. For this next section, follow your intuition. You can do know wrong! Imagine the baking dish is your canvas and you are using the colors, textures and tastes to make the art come alive. I like to lay the first noodles down. Then add a layer of the ricotta mixture, followed by a layer of veggies , then noodles, then tomato sauce, then more veggies, then noodles, then ricotta, then veggies etc….

  5. Once you get to the top of the baking dish, end with a noodle layer topped with tomato sauce. Add mozzarella cheese on top.

  6. Bake in the oven covered with tinfoil at 375F for about 40 minutes. Take the tin foil off and bake for another 5-10 minutes so that the cheese browns. You will know it’s done when you can easily stick a knife through the dish. If you like the noodles to be softer, you might want to cook it longer. Notice the smells that come alive. What does your heart and body tell you while you wait? Sometimes I find this dish to be a labor of love that makes my heart/soul/belly happy.

  7. As the lasagna cools, feel free to top with prosciutto and or basil.

  8. Enjoy eating, sharing or saving this dish with lots of love.

If you feel inspired, share your mindful cooking practice or anything you are learning/noticing in the comments below or on Instagram with us.

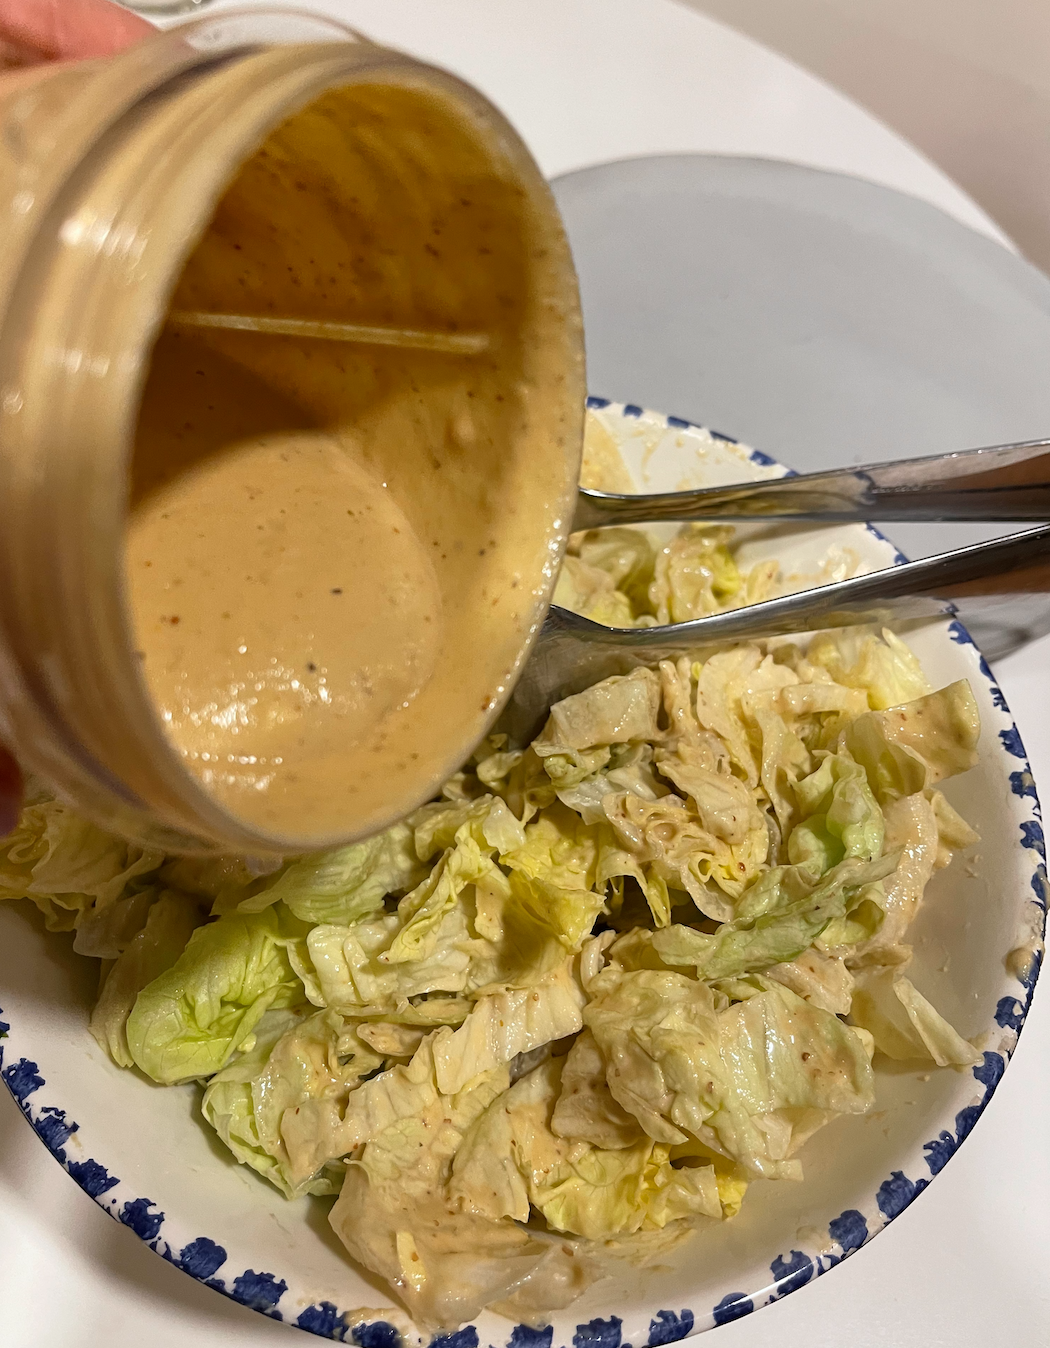
Vegan Caesar Dressing

Yummm! This savory dressing is delicious on salads or is a great veggie dipper. I crave this sauce when I get bored with my typical go-to balsamic dressing and want something thicker with more savory notes. I also love that this recipe is dairy-free, so my body has an easier time digesting it than regular Caesar dressing. Using it on crunchy lettuce like romaine helps balance it out.


Ingredients: (makes about a cup of dressing)

  • 1/2 cup raw cashews (I used the cashew pieces from Trader Joe’s)

  • 1 garlic clove chopped

  • 1/2 of lemon (juiced)

  • 1 teaspoon dijon Mustard

  • 3 tablespoons of nutritional yeast

  • 2 tablespoons Bragg’s liquid aminos

  • 1 tablespoon of apple cider vinegar (red wine vinegar works too)

  • 2 teaspoons Worcestershire sauce

  • 1/3 cup of water

  • Pepper to taste


Directions:

  1. Soak cashews in warm water for 15 minutes (until they are tender). Drain the cashews and discard the water. Notice the slimy texture of the cashews. Notice your reaction. Does it feel pleasant? Gross? Neutral?

  2. In a bullet blender or food processor, add the soaked cashews, garlic, lemon juice, mustard, liquid aminos, apple cider vinegar, and Worcestershire sauce. Notice the variety of smells and colors. What images or memories come to mind?

  3. Blend evenly. What thoughts are popping up as you watch the sauce blend?

  4. Add the nutritional yeast and 1/3 cup of water to reduce thickness. Blend again.

  5. Taste and smell. What comes alive for you?

  6. Add pepper to balance the salt.

  7. Do your taste buds want to adjust anything? Follow your intuition. More pepper? You can add lemon juice or vinegar if you want more acid flavor. Add more nutritional yeast if you want it even “cheesier” tasting.

  8. Store in an airtight container if the fridge for up to 7 days. Mindfully enjoy!

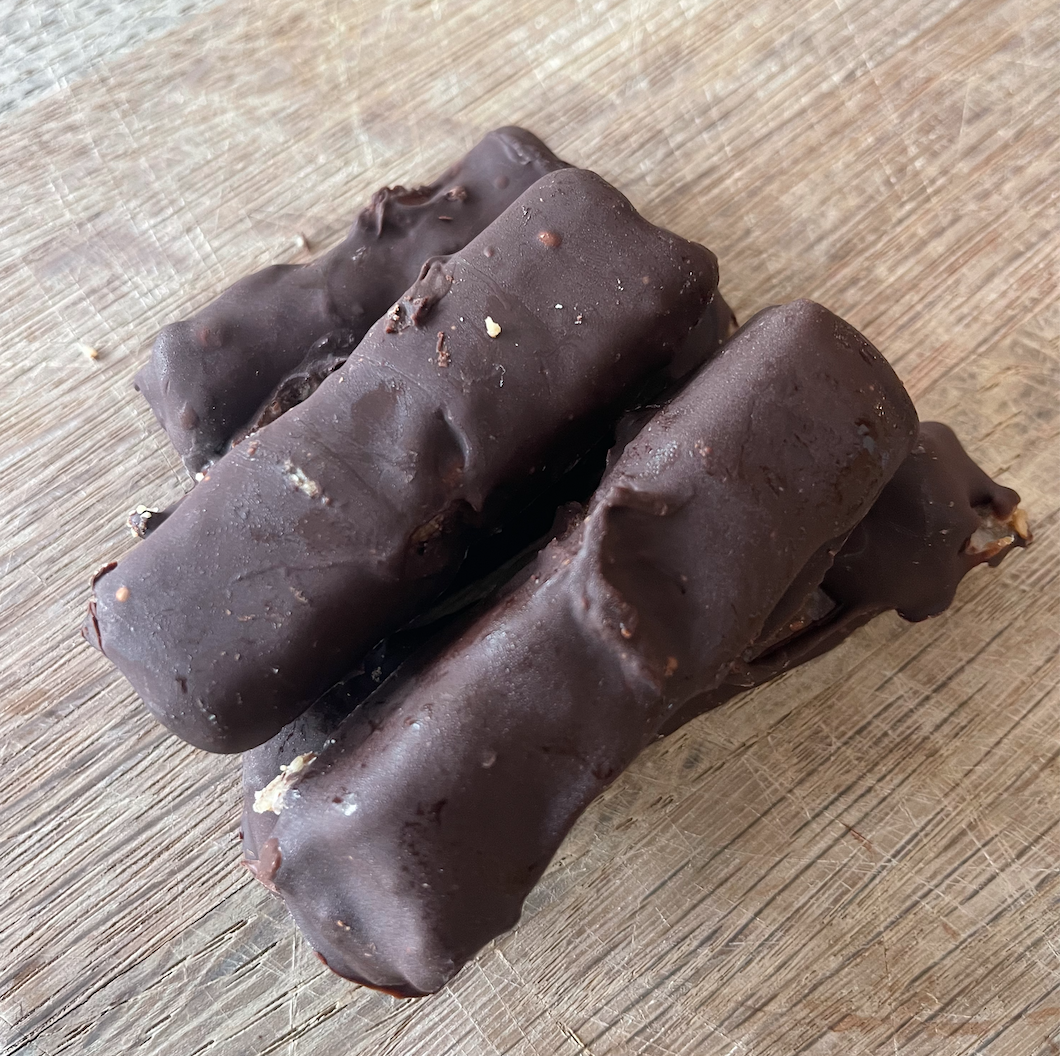
No Bake Mini Twix

This recipe is so fun to make and doesn’t involve and real “baking.” Does it taste like real Twix, no. Let’s be real. That candy bar is full of corny syrup and fake flavors. However, this recipe satisfied my sweet tooth because of it’s crunchy chocolate cookie crunch and caramel flavor. Its full of protein and healthy fats. I find it fun to get creative in the kitchen and explore how to make sweets more delicious by using more nutritious ingredients.

When you crave sweets, what does your body typical yearn for? Gummy texture? Crunch? Smooth? Gooey? Sour? Nutty? etc

Ingredients for the Caramel:

  • 15 dates (with the pit removed)

  • 2 tablespoons virgin coconut oil

  • 1 teaspoon vanilla

  • 1/8 teaspoon salt

Ingredients for the Cookie:

  • 1 cup almond meal

  • 1/4 cup room temperature virgin coconut oil

  • 1 tablespoon maple syrup

  • 1/4 cup sunflower butter (or cashew butter)

  • 1/8 teaspoon salt

Chocolate Coasting:

  • 8 oz dark chocolate

  • 1 1/2 tablespoons virgin coconut oil


Directions:

  1. In a bowl, add all of the cookie ingredients and mix together with your fork. Notice your senses as you mix. Notice your relationship or thoughts to each ingredient. How does your body feel as you mix?

  2. In a pan about 8x8 inches or on a baking sheet, place parchment paper down. Take the cookie dough and with a fork, gently smear the dough into a square shape. This is the cookie “crunch” for this no bake dessert. Tune into your intuition about how think you want it to be. I made mine about a few centimeters thick.

  3. Next, make the caramel. In a food processor, add all of the caramel ingredients. Notice what the texture of dates feels like in your fingers. Notice how the coconut oil and vanilla smell. Blend together until it becomes a “gooey” ball.

  4. Take the caramel mixture and evenly spread it over the cookie dough. You can use your hands like clay, use a fork or parchment paper to smooth it out evenly. Notice what it feels like to “play” with this dough. What senses, emotions or thoughts come to mind? What does it feel like to get your “hands dirty?”

  5. Now we get to practice patience. Place this pan with the cookie dough and caramel into the freezer and let it sit for a minimum of two hours. This is the “baking” process so that the ingredients bind. Notice your relationship to waiting. Does you mouth salivate in anticipation? Do you feel tempted to eat the dough etc.

  6. About 5 minutes before you take the cookie dough out of the freezer, you get to make the chocolate coating! In a microwave safe bowl, add the chocolate and coconut oil. Put in the microwave for 30 seconds at a time and stir so that the chocolate melts evenly and doesn’t burn.

  7. Take the cookie dough out of the freezer. On a cutting board, place the parchment paper and frozen dough. Using a sharp knife, cut the dough into 2-3 inch long bars and about 1/2 inch wide (permission to cut whatever shape or size you want!).

  8. Place new parchment paper on the tray.

  9. Using your fingers (which gets messy…see the top photo) or spoons, dip each cookie bar into the melted chocolate so that it is evenly covered. Place finished pieces back on the new parchment paper. Notice your relationship to covering the cookie bar in chocolate. Are you afraid to get messy? Do you love it?

  10. Place the chocolate covered cookie bars in the freezer for another 30 minutes so that the chocolate hardens.

  11. Taste test your no bake Twix bar and notice what thoughts arise, memories, and emotions. Notice how this satisfies your sweet craving or explore what’s missing. How does this “candy bar” make your body feel?


    Share your experience with us in the comments below!


Prosciutto Sweet Potato Wedges

This dish is so easy to make and it’s versatile! You can make it as an app for a party, a delicious side, or a light and filling main dish. You can add a fried egg for fun brunch vibes, place on top of a beautiful salad or serve next to other veggies/ proteins. The textures and salty sweet flavors of this dish compliment each other so well.

Notice what part of you gets excited about this dish (ie. does your mouth water, your stomach growl or do your fingers want something to play with etc). Pay attention to what you are nourishing and notice with love and care.

Ingredients:

  • Sweet potatoes or yams (they both work!)

  • Prosciutto (~4 oz works for 3 medium potatoes)

  • Pesto (homemade or store bought)

  • 1 tablespoon of olive oil

  • Salt & peper to taste

Directions:

  1. Preheat oven to 415F

  2. Wash your sweet potatoes well and dry them off. Feel the texture of the skins and the interesting and unique shape of each potato.

  3. Chop into thick wedges. You get to decide how thick you want them. Try to chop as evenly as possible so that they can cook around the same time.

  4. On a baking sheet, lightly drizzle olive oil and swirl your potato wedges around (like the potatoes are taking a swim in the olive oil), coating both sides in olive oil. Lightly sprinkle salt and pepper on the wedges.

  5. Spread the wedges out on the baking sheet so they have some breathing space.

  6. Bake for 30 minutes until the wedges are soft enough to put a fork through them. (Optional, to flip them about half-way though cooking).

  7. Let them cool, before wrapping each wedge with 1/2 to whole piece of prosciutto—feeling the texture of the meat and sweet potato meeting. Take a moment to send gratitude to the meat and sweet potatoes for all they have been through to get to this moment.

  8. Sprinkle as much or as little pesto as your senses desire one each wedge. Notice the smell of the pesto. Does it evoke memories or feelings?

  9. Enjoy mindfully eating each sweet and savory bite.

Lemon Blueberry Pound Cake

My mouth just waters looking at this photo and thinking about how good this pound cake tastes. This is a great recipe to make with blueberries, but I think leaving them out or using any other berry or stone fruit would still taste delicious.

Ingredients:

  • 1 cup coconut sugar or granulated white sugar (I like using coconut sugar because it is easier for most bodies to digest)

  • 1/2 salted butter at room temperature

  • 2 large eggs at room temperature

  • 1 1/2 cup flour (I like Flourish Flour because it is high in fiber and not bleached)

  • 1 teaspoon baking powder

  • 1/2 milk (I used whole milk because we had it, but otherwise I would use your favorite non dairy “fatty” milk like oat, coconut or cashew).

  • 1/2 cup blueberries (fresh or frozen)

  • 1 teaspoon lemon zest

  • 2-3 tablespoons fresh lemon juice (the juice of one whole medium to small lemon)

  • 1/8 teaspoon salt

Directions:

  1. Preheat the oven to 350F

  2. In an electric mixing bowl, add the butter, sugar and eggs and mix for a few minutes until everything is evenly combined. Notice the color of the yokes as you crack each one. Notice the smells as you mix everything together. Notice the color and texture of the batter.

  3. Using a zesting tool or a food grader, make as much lemon zest as you can make from you lemon. Notice what smells and memories are evoked for you. Notice the patience it takes to zest the lemon. Once you zest, cut the lemon in half and use a lemon squeezer to collect 2-3 tablespoons of juice. Add the zest and juice to the mixing bowl and mix for 30 seconds.

  4. Next, add the flour, baking powder and salt. While you gentle mix in these ingredients, add the milk a little bit at a time. Observe how the texture changes and the liquid gets absorbed.

  5. Finally, gentle fold the blueberries in, using a spatula to evenly mix everything.

  6. Place the batter in a 4.5 x 8.5 baking loaf. You can use nonstick spray or parchment paper so that you can easily enjoy the pound cake after it bakes.

  7. Bake the pound cake for 60 ish minutes until it’s golden brown and slightly cracked open. A great way to test if it’s done is to stick a knife in the center and when the knife is clear of any batter, it’s ready to get pulled out of the oven. I started to notice the house smelling delicious around 30 minutes, but it needs a lot more time to cook. Notice your relationship to waiting or being patient.

  8. Let the pound cake cool completely before cutting it open. Store with saran wrap and mindfully enjoy for a few days. When you take your first bite, notice what feelings or sensations come alive for you. What memories or images come to mind? How does this nourishment feel in your body?

Feta Chopped Salad

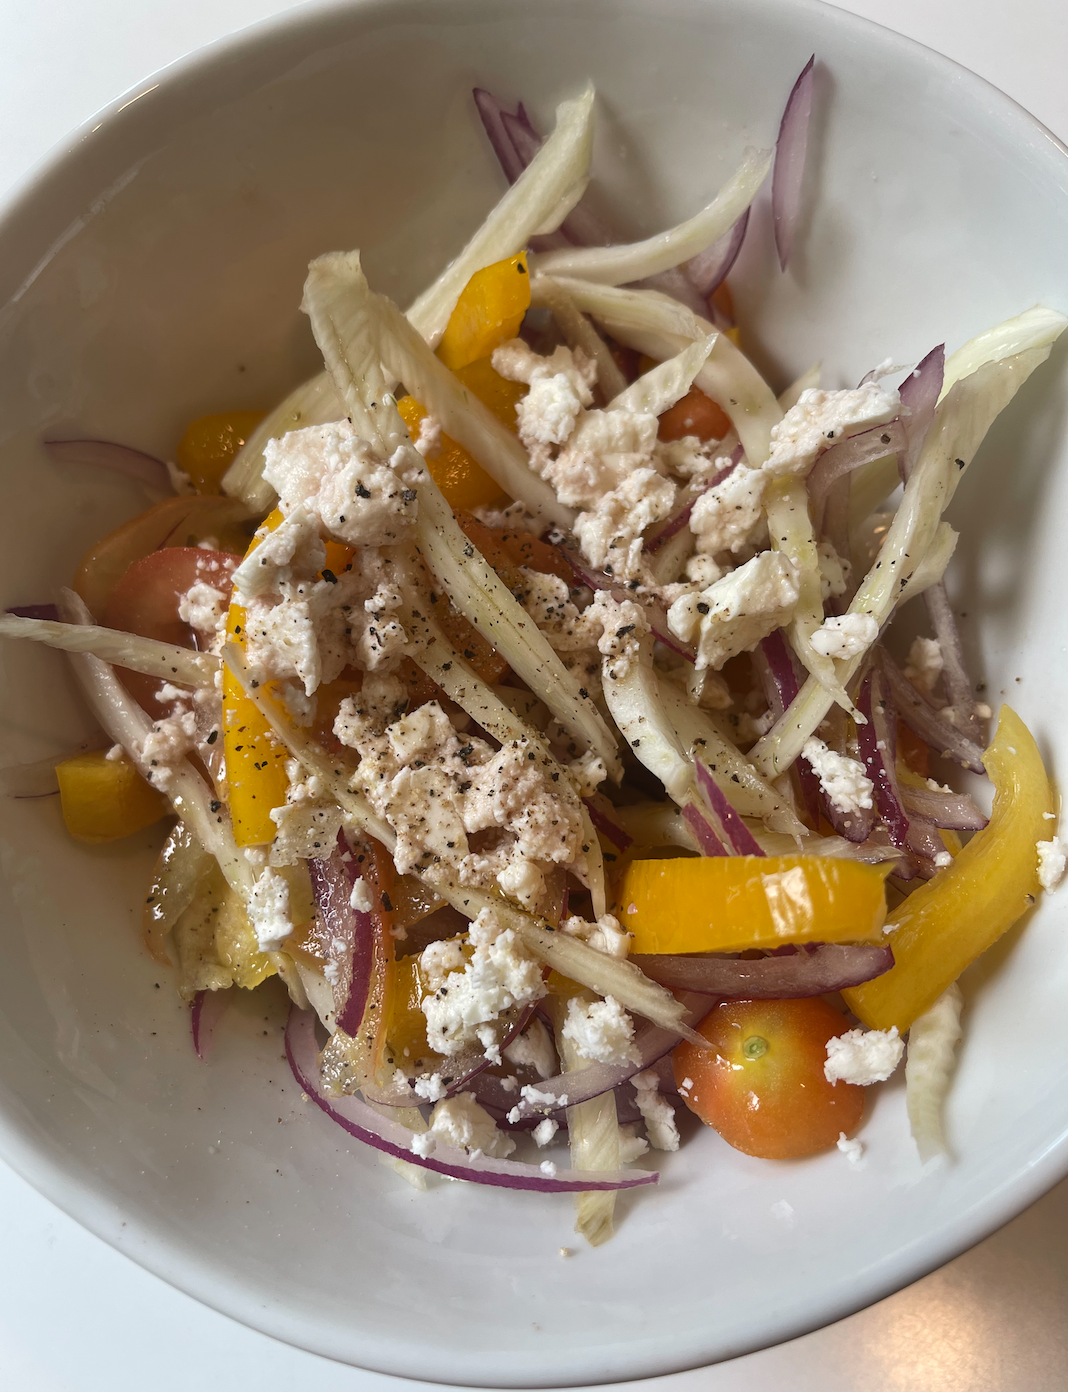
I stumbled upon this delicious chopped salad when I kept running out of fresh lettuce during the pandemic. I realized I could break free from what I thought a salad “had” to be and instead just listen to what my body craved, which was savory raw crunchy veggies. You can do no wrong with this recipe. Use whatever vegetables you have in your fridge to create your own version. You can also let the current season inspire your creation. Think about what’s fresh this season. Think about what your body is wanting? Feel free to ditch the cheese and/or add your favorite vegan cheese substitute.

My favorite combo/Ingredients:

  • half a fennel bulb, thinly sliced

  • 1/4 of a red onion, thinly sliced

  • 1/2 a fresh bell pepper (use whatever color inspires you)

  • 1/2 a cucumber, sliced in quarters with no skin

  • handful of cherry tomatoes, sliced

  • 1/4 cup of feta crumbled

  • High quality olive oil (I like this one, but tend to mix it up)

  • Red wine vinegar

  • Salt & pepper

  • Any fresh herbs (basil or mint can be fun additions)

  • Optional to add the roasted chickpeas for protein

Directions:

  1. Explore your fridge and think about what hardy veggies do you have in your fridge to make a chopped salad. Think about color and texture as you design your bowl.

  2. Wash and prep your veggies.

  3. Thinly cut your vegetables or chop in similar sizes. This is where our mindful attention comes into play. Practicing patience with smaller chops. Finding our breath when we get frustrated or lost in thought. Come back to the sensation of cutting. Have fun exploring how veggies taste differently depending on how they are cut.

  4. Place all of the chopped and sliced veggies in a big bowl. Crumble in the feta. Sprinkle olive oil and red wine vinegar over the veggies. Add some salt and pepper. Mix the chopped salad and let it sit for a few minutes to gather more flavor. Adding raw onion gets slightly pickled by the red wine vinegar. Send gratitude to this bowl and celebrate the bounty and beauty of the colors.

  5. Mindfully eat and enjoy! Notice how your jaw has to work a little harder. Notice the sensation of chopped veggies in your mouth. Notice how your senses take in the color and texture mixture of your salad. Notice how your body feels as you eat.

  6. Save any leftovers in an airtight container for 2 days.

Magical Summer Salad

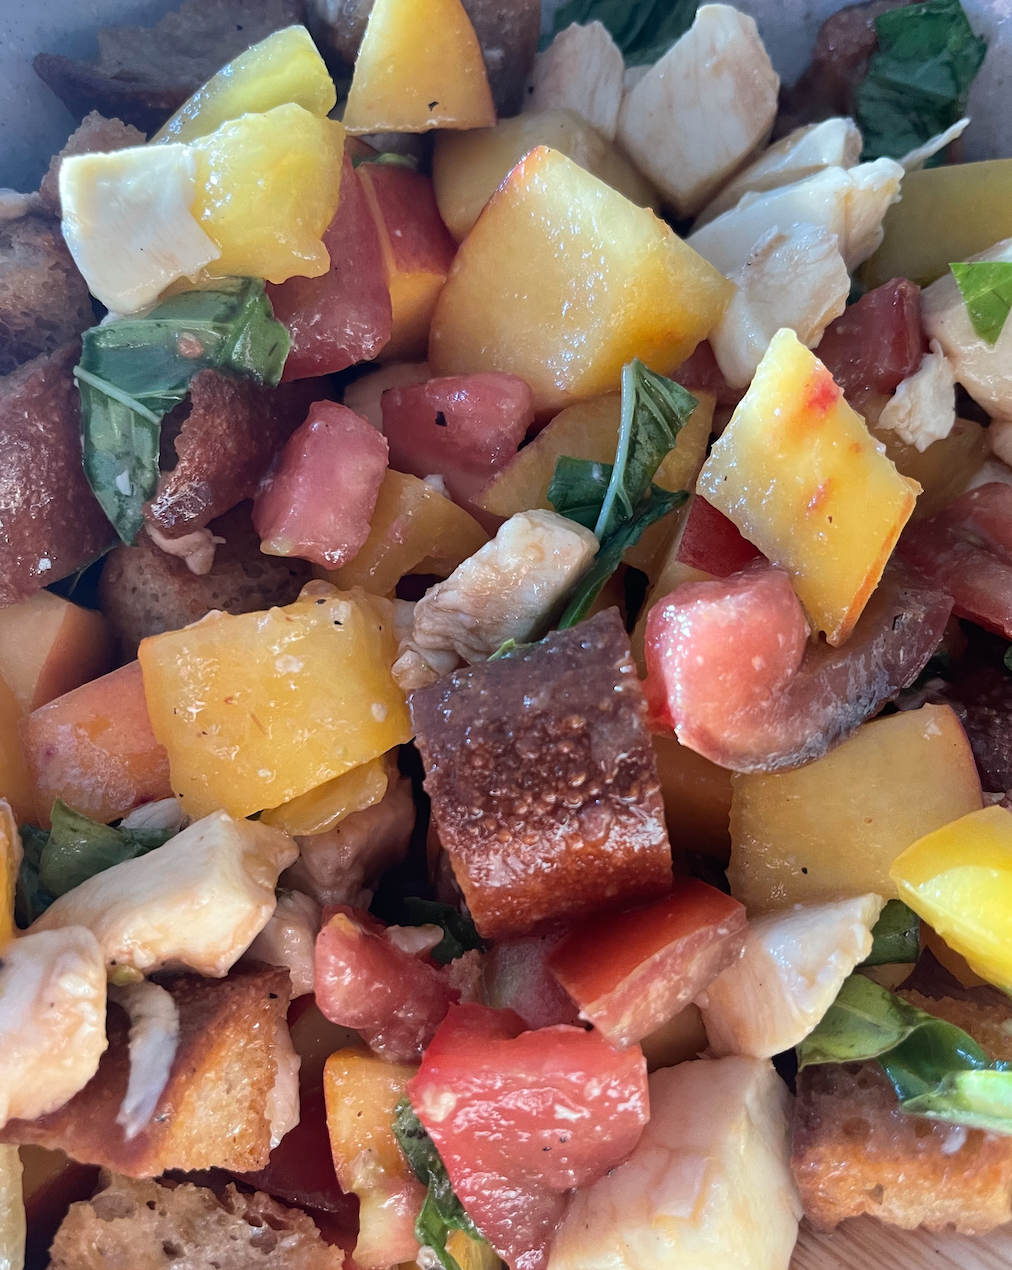
This salad looks, smells and tastes like summer, which makes my heart so happy. This is the most satisfying salad to eat on a hot summer evening because of the cooling fresh balance of nectarines, heirloom tomatoes, mozzarella and basil. This salad also has such a satisfying crunch. All of these products are fresh in season in the northern hemisphere. Notice what the freshness taste like. Follow you intuition if you need to make any modifications to this recipe (ie. using GF bread, vegan cheese or remove the stone fruit). Notice what thoughts and memories come alive when you make this salad. Notice what parts of your heart, mind and body this salad nourishes. Notice how the shapes and sizes of the different ingredients taste and feel.

Ingredients: ( around 4-6 servings)

  • 2 semi hard nectarines

  • 2 large heirloom tomatoes

  • 8 oz fresh organic mozzarella

  • ~10 basil leaves

  • Balsamic glaze or vinegar

  • High quality olive oil

  • 1/4 day old baguette

  • Salt & pepper to taste (Himalayan salt is my favorite)

Directions:

  1. As you wash and dry the nectarines, tomatoes and basil, take a moment to send gratitude to these fresh produce and all the hands that helped these ingredients get to you in this moment.

  2. Pre-heat oven to 415F.

  3. Chop the day old bread into 1/2 inch cubes and place on a baking pan. Lightly drizzle with olive oil and salt and pepper. Place in the oven to toast for 5-10 minutes. Make sure they get to a light brown color where they are crunchy, but not burnt. Let them cool completely.

  4. Chop the nectarines in 1/2 inch cubes—notice urges to eat the nectarine as you chop.

  5. Chop the tomatoes into 1/2 inch cubes—notice the patience and focus it takes. What mind state do you experience?

  6. Chop the mozzarella into 1/2 inch cubes—feel the texture and notice the smells.

  7. Slice the basil into thin pieces.

  8. Place all of the ingredients (beside the bread) into a big bowl. Gentle mix together and add a big splash or olive oil and balsamic. Add the bread and sprinkle a little more salt & pepper if needed. Gentle mix together and enjoy immediately. (If you want to wait to serve this salad, make sure to wait to add the bread at the very end so that it doesn’t get too soggy).

  9. Enjoy the tastes of summer dancing on your tongue and belly.

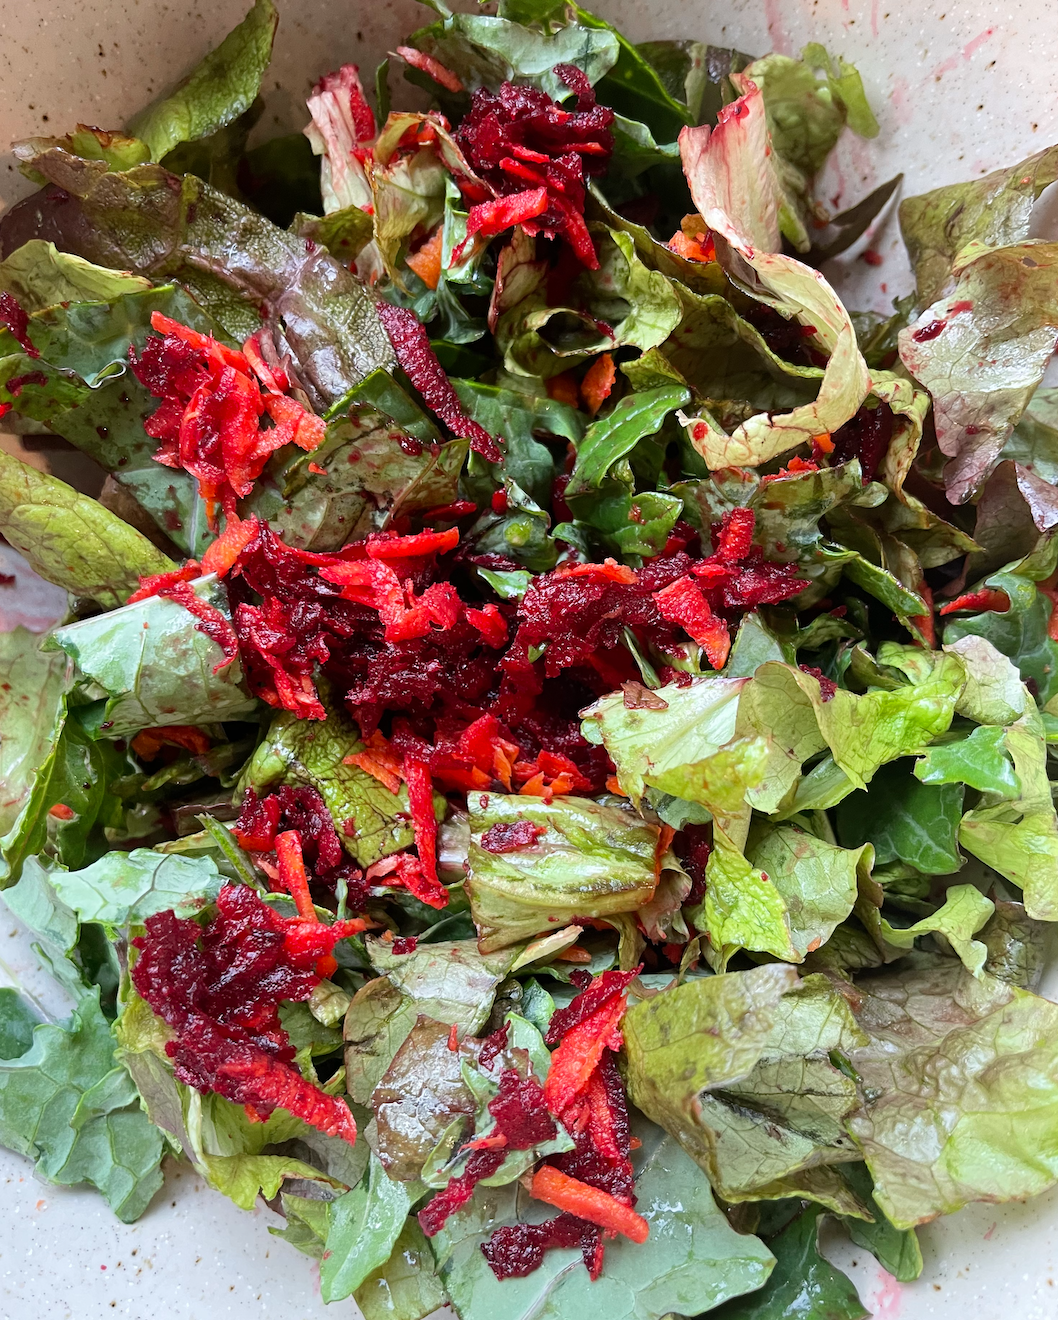
Shredded Beet & Carrot Salad

This is one of my go-to salads when my body is craving raw hardy veggies and a boost of hydration. Typically, my body feels this way after a few days of not getting a lot of fresh vegetables. This recipe helps to rebalance my system. Sometimes I just make this beet and carrot mixture and other times I add it to a bowl of greens and other veggies. Notice what your body and senses are wanting and needing. Notice how carrots and beets taste differently when they are served shredded versus chopped or cooked.

Ingredients: (serve 1-2 people)

  • 1 medium to large raw red beet (washed well and the outside layer peeled)

  • 2 whole large carrots (washed and peeled)

  • Optional: add to a bowl of greens with sunflower/pumpkin seeds

  • Your favorite salad dressing

Directions:

  1. In a large bowl, use a grater on the large section to grate the beet. Be very mindful of your fingers and knuckles. I try to wear these gloves. Grate as much of the beet as you feel comfortable. Notice the earthy smell of the beet. The bright bold color.

  2. In the same bowl, grate your carrots on the large section of the grater. Notice the sweet smells. What do carrots remind you of?

  3. Mix both of the carrots and beets together to blend into a beautiful color pallet.

  4. Option to add this to a big bowl of greens and top with pumpkin seeds/sunflower seeds for some plant protein.

  5. Use your favorite dressing or lightly sprinkle olive oil, balsamic, salt and pepper. Let the sweet and nutrient dense veggies nourish your system.

Mediterranean Veggie & Meat Wrap (vegetarian/ vegan options)

Mediterranean and Middle East flavors are so fresh that I feel they wake up my body and mood. In this recipe, I used ground lamb, but you could use beef, turkey, chicken or go hummus or hard boiled eggs for a vegetarian/vegan combo.

Pause to check-in with your body and listen to what your body is hungry for. Sometimes when we pause to ask ourselves, we hear and feel something different than what we “assumed” we wanted.

This recipe is great to batch cook for easy healthy meals for the week or a fun recipe to make for BBQs or dinner parties.

Play in your kitchen and make this meal your own. Share your thoughts/tips/ recipe tweaks with us in the comments below!

Ingredients for the meat:

  • 1 lb organic grass fed ground lamb (makes about 9 lamb “balls”)

  • 4 garlic gloves, finely chopped

  • 1/2 onion finely chopped

  • 2 tablespoons (or more) of freshly chopped parsley

  • 1 tablespoons (or more) of freshly chopped mint

  • Salt & pepper

Ingredients for the wrap:

Directions:

  1. If you are adding quick pickles to your recipe, start those first so they can “cook” while you make the lamb “balls”.

  2. In a bowl, combine your ground meat, garlic, onions, salt & pepper & fresh herbs. Notice the smells as you combine everything.

  3. Make your meat into mini sausage shapes. This shape makes it easier to fold into a wrap. Notice how it feels to mix all of the ingredients in your hands. Smell the herbs come alive. Do memories come to mind as you make this dish? Sometimes I get squeamish when handling raw meat, but when I mindfully send the animal gratitude it helps me feel more connected and less “fearful.”

  4. On the stove top or grill, add oil that is good to cook with at high temperatures (avocado oil, coconut oil, grape seed oil, ghee). Just enough to slightly coat the pan to prevent the meat from sticking. Place the lamb “balls” on the pan and cook on each side for ~ 7 minutes each. You can cut one open to make sure it’s your desired doneness. I like ground lamb on the medium side.

  5. Let them cool once fully cooked.

  6. Make the tzatziki recipe

  7. Lightly heat up a wrap on the stove top or in a toaster oven. Make sure it doesn’t get too crispy so that it can fold easily

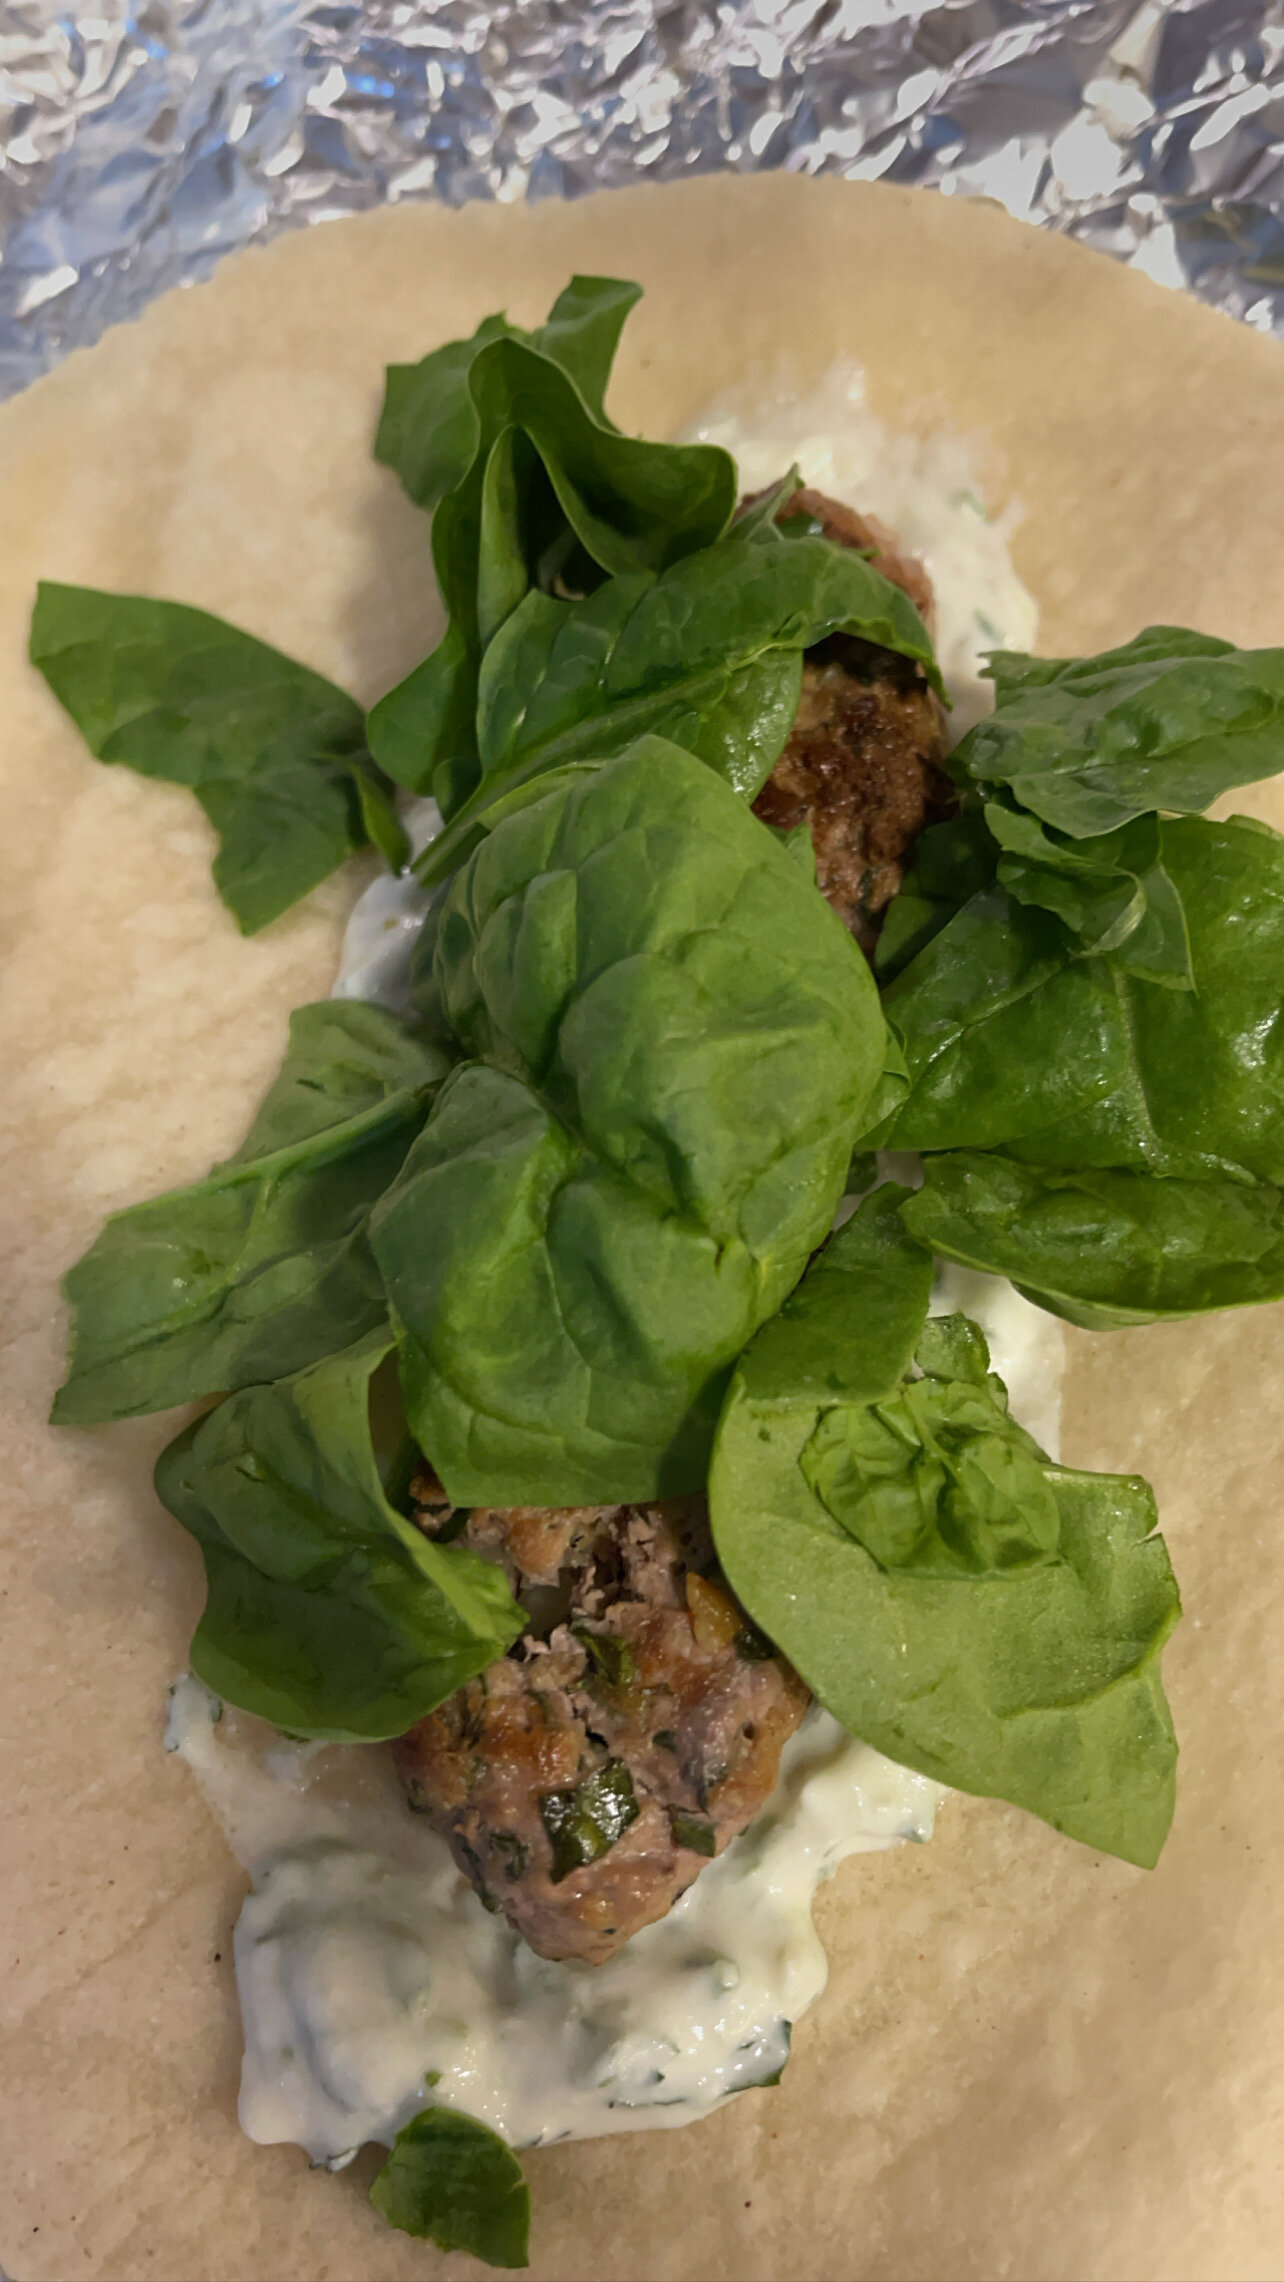
  8. Place tzatziki on the bottom of the wrap. Place 2 lamb “balls” on the center followed by lettuce and cabbage. Sprinkle feta on top and as many pickled veggies as your heart desires. Fold the wrap and enjoy mindfully with lots of napkins! (If you are using hummus or eggs, follow the same directions and swap out what you don’t want).

  9. Enjoy getting messy while you eat. Notice how the variety of textures feel in your mouth and hands. Savor each bite with curiosity and gratitude.

Screen Shot 2021-07-19 at 3.35.19 PM.png
FA4FBCC4-944B-4FCC-B1A1-06AAC5A04870.JPG

Ssamjang (Korean Dipping Sauce)

I was introduced to this sauce while on a meditation retreat and it was so delicious I asked the chef to share the recipe. This sauce is a delicious combination of light spice and sweet. Great to add to any rice or noodle bowl, lettuce wrap, taco or meat satay.

Ingredients:

  • 10 garlic cloves (for garlic confit)

  • 1/4 cup olive oil

  • 3 tablespoon Gochujang (Korean Chili Paste)

  • 3 tablespoon maple syrup

  • 3 tablespoon sesame oil

Directions:

  1. Let’s make the garlic confit! Peal 10 garlic cloves and add them to a small pot with 1/4 cup olive oil. On low heat, simmer the garlic in the olive oil for 30-60 minutes. Lots of patience is needed here to slowly cook the garlic. Watch with care and curiosity to make sure the garlic isn’t burning, but gets a light browned color and is fully soft. Notice the smells of garlic. Notice your relationship to patience as you stir the garlic and check on the progress.

  2. Once the garlic confit is fully browned and tender add to a small blender or bowl with the olive oil, sesame oil, maple syrup and Gochujang paste. This sauce will be thick. Taste it. Do your taste buds want more sweet or spicy flavors? Does it feel balanced to you? Add more maple syrup if you want it more sweet.

  3. Store leftover sauce in the fridge for two weeks and use on various dishes to help spice up your dishes with some sauce made with lots of love.

Miso Glazed Carrots

Ingredients:

  • 10 large whole carrots. Washed with the tips cut off.

Miso Glaze:

  • 2 tablespoons white miso paste

  • 1 teaspoon honey (or maple syrup)

  • 1 tablespoon Braggs amino acid (you can also use soy sauce)

  • 1 garlic clove

  • 1 tablespoon sesame oil

Directions:

  1. Preheat the oven to 400F

  2. In a small blender or bowl, add the above ingredients for the miso glaze. Combine until the sauce is smooth. Notice the smells. Do memories come alive to you? If the sauce is too thick to spread evenly, add a tablespoon of water.

  3. Prep the carrots and place on a baking sheet. Optional to use parchment paper. Evenly coat the carrots with the miso glaze. Notice your thoughts and relationship to carrots. (For instance, sometimes I notice I take carrots for granted because they are so cheap. Or I only use them in salads or juices and it feels “silly” to make them the main veggie.) What comes up for you?

  4. Roast in the oven for 30ish minutes, rotating the carrots half-way through. When the carrots cut easily with a knife and have a light browned dehydrated look, they are finished cooking.

  5. Let them cool and serve them however you’d like. I like to cut them into inch sized pieces if I am adding them to a bowl. Otherwise, keeping them whole is a fun way to cut them and eat them like “steaks.” Listen to what your body and intuition want here. You can do no wrong!

Comforting Chilaquiles

I loved playing with this recipe in the kitchen while in Mexico. This dish was way easier to make then my mind thought it would be, delicious, fun, festive and very satisfying. This recipe serves about 2 people. You can also double this recipe for a fun interactive brunch so people can add additional toppings or sides. Or you can enjoy leftovers or save some of the salsa roja for future dishes. The main part of this recipe is making the delicious salsa roja sauce that I think would taste great over any grilled meat or toasted beans.

Ingredients:

  • 2 roma tomatoes

  • 1/4 of a white or yellow medium sized onion

  • 3 garlic cloves (peeled and crushed or chopped)

  • 3/4 cup veggie or chicken stock

  • Salt to taste

  • Two generous handfuls of tortilla chips. (The thicker the better soo they can hold the sauce).

  • Optional: if you enjoy spice you can add 1 small jalepeno with the seeds removed or your favorite hot sauce of choice.

  • Optional toppings: fried egg(s), sliced avocado/mashed/guacamole, cotija cheese, your favorite beans etc

Directions:

  1. Wash and chop the tomatoes, onions, garlic and jalepeno. Notice your relationship to each ingredient as you chop. What thoughts go through your mind as you notice the tomato juice/seeds squirt out? How does you your senses respond to the smell of onions and garlic. What is your relationship to the jalepeno as you touch and chop it?

  2. Place everything in a blender or food processor and blend until it is a thick liquid. Notice the beautiful color and interesting texture of the sauce. What comes alive for you here?

  3. Heat a frying pan on medium heat. Add the blended ingredients plus the 3/4 cup of stock. Let the sauce simmer and thicken with flavor. Taste this dish and sprinkle in some salt or any other spices that your intuition or taste buds are calling for.

  4. The salsa roja sauce thickens in about ~5-10 min. While this is happening, take the opportunity to make your fried eggs so the meal can be timed well. Remember, your eggs don’t have to look like an instagram picture to be delicious and perfect for your meal.

  5. When the sauce has thickened, you will add the handfuls of tortilla chips and evenly coat in the pan. Turn the heat off and top with your fried egg(s) and any other topping your heart and body crave.

  6. Enjoy the savory, crunchy and comforting layers of this dish. Notice what part of your senses light up. Does your mouth start to water? Do your hands want to jump right in? Lovingly and curiously pay attention.

Cauliflower Parmesan Bites

I stumbled on creating this recipe a few weeks ago when heading to a friend’s house for dinner and they asked if I would bring an appetizer. I am always a huge fan of bringing veggies for any sort of dish because in my opinion, we can never have too many vegetables! I see vegetables, no matter how they are cooked, as nutrients for our cells that give us more qi (energy). These delectable bites keep the snacking fingers, eyes, taste buds and body happy. They are also such a fun way to mix up our appetizer or side veggie game.

Ingredients:

  • Whole medium/large head of organic cauliflower or pre-packed cauliflower florets

  • 1 cup Italian bread crumbs (or gf bread crumbs of choice)

  • 1 tablespoon whole wheat flour (you can skip this step, but it helps make the breading stick)

  • 1/2 cup grated parmesan cheese

  • 1 teaspoon garlic powder

  • 1 teaspoon oregano

  • 1 teaspoon dried basil

  • 1/4 teaspoon salt

  • 1/4 teaspoon smoked paprika

  • 2 eggs

Directions:

  1. Pre-heat the oven to 400F. Prep a cookie sheet with parchment paper.

  2. Wash and prep the cauliflower into small florets. Make sure they are well dried. Notice the interesting shapes of the cauliflower. Notice the smells and textures.

  3. Combine all dry ingredients (breadcrumbs, seasoning, salt and cheese) in a medium bowl and evenly mix. Do you smell one spice stronger than the other? Notice if your mouth waters and craves a different type of spice—follow your instincts and add whatever you desire. Does this mixture create any memories or flashbacks for you?

  4. Beat the eggs together in a small bowl. Look at the color of the eggs. Notice how the yoke and albumen (white part) of the egg mix.

  5. Dip each floret into the egg mixture and lightly but evenly coat it.

  6. Gently roll the eggy cauliflower into the breadcrumb mixture so that the cauliflower is evenly coated with crunch.

  7. Place on the baking sheet. Repeat until each floret is complete.

  8. Bake for 15 minutes on each side. Make sure to flip so that they are evenly crispy and slightly browned.

  9. Serve with your favorite dipping sauce. I loved using tomato sauce or pesto.

  10. Mindfully enjoy each bite—sensing the crunch, flavors, smells, sounds and how it feels in your body. Notice as you enjoy these delectable bites, do you fingers want more, your eyes, your mouth, your heart, boredom or your belly.

The Best Kale Salad

This is one of the best kale salads I have ever made. It sounds dramatic, but it’s true and I was so impressed with how “restaurant quality” it tasted. In fact, this recipe is based on a delicious kale salad from a local Italian restaurant in Seattle called Il Corvo. This recipe takes a lot of time and care, but I promise it it worth it. A great recipe to batch cook for a bunch of meals throughout the week. Or a great recipe to make when you host or go to a potluck. This dish feels healthy, indulgent, comforting and inspiring all at the same time. Great to service as a main dish with toasted chickpeas or protein of choice. Or you can pair this with one of the soups, pizzas or pasta dishes in the nourish section.
Ingredients: (about 6 servings)

  • 3 bunches of dino kale (or Tuscan kale). Washed and finely chopped without the stems

  • 12 garlic cloves

  • 1/4 cup fresh parsley

  • 1/2 cup grated parmigano cheese

  • 2 tablespoons apple cider vinegar

  • 2 tablespoons fresh lemon juice

  • 1/4 cup good quality olive oil plus a splash of olive oil to massage the kale

  • 1/2 teaspoon salt

  • 1/4 cup toasted pumpkin seeds (you can toast raw seeds or buy toasted unsalted)

  • 3 tablespoons of golden raisins (optional)

Directions:

  1. Wash the kale and dry it really well. Finely chop the kale. The smaller the better.

  2. Place kale in a big bowl and massage the kale by using a splash of olive oil and 1/2 teaspoon of sea salt. Let it sit.

  3. Wash and chop parsley, removing the stems. Smell the herb come alive as you chop. Watch it stick to your fingers. Place it to the side.

  4. Peel 12 garlic cloves (keep them whole)

  5. In a small sauce pan or cast iron, place 1/4 cup of olive oil and the 12 garlic cloves. Cook the garlic on a very low eat for about 30 minutes. You are making garlic confit. Watch the garlic closely so that it doesn’t burn. This process fills the home with the delicious smell of garlic and it’s a beautiful mindfulness process to watch the cloves take different shapes and colors. It can also be interested to watch the mind or hands get impatient. See if you can breathe into that and notice your relationship to waiting and cooking.

  6. To make the dressing, in a food processor or magic bullet, add the cooked garlic and olive oil, parsley, apple cider vinegar, lemon juice, and parmigiano. Blend until everything evenly combines. The dressing will be thick, but if it feels too thick taste it and determine if it needs more vinegar or olive oil.

  7. Mix the dressing on the kale evenly.

  8. Optional to add more grated parmigiano n the top for a cheesier flavor.

  9. Top with toasted pumpkin seeds to give it a beautiful crunch. Optional to add golden raisins.

  10. Salt & pepper to taste.

  11. Enjoy eating it mindfully! Taste all of the flavors and textures.