Nourish

Immune Boosting Juice

Screen Shot 2020-10-19 at 8.51.04 AM.png

I am obsessed with this juicy. It feels like liquid power being sent to my immune system. I use to be intimidated by juicing and have a lot of judgments around it. For instance, I used to think juicing was just a trendy thing. But in the last few years, I have learned to really love juicing and see it as another way to live into my value of health and send more nutrients to my body. It feels so good to get more fresh veggies and fruit into my system and I notice it helps decrease acne and inflammation on my face. I try to drink this juice or my other recipe in the morning before I have coffee or any other food to help the nutrients get absorbed faster.

I use this Breville juicer and really love it. It is easy to clean and store away.

Ingredients:

  • 3 blood oranges (you can use navel oranges as well). These have a lot of vitamin A and C

  • 5 large carrots. Great source of vitamin K1 and potassium

  • 4 celery stocks. Great source of vitamin A, K, C as well as potassium and sodium.

  • 1 inch Fresh ginger with the skin peeled off (add more if you like your juice to have a super strong ginger taste). Ginger helps with inflammatory properties, which helps reduce stress and joint pain in the body.

  • 1 Turmeric root (2-3 inches) with the skin peeled off.

  • Black pepper (optional, but the black pepper helps the turmeric get absorbed in the body).

Directions:

  1. Peel oranges and wash all veggies really well. Cut off the ends of the celery stocks and carrot tops.

  2. Turn on your juicer and add the ingredients in any order.

  3. Stir the juice so it evenly combines. Store your juice in an airtight glass jar for 24 hours (sometime I even push it to 48 hours).

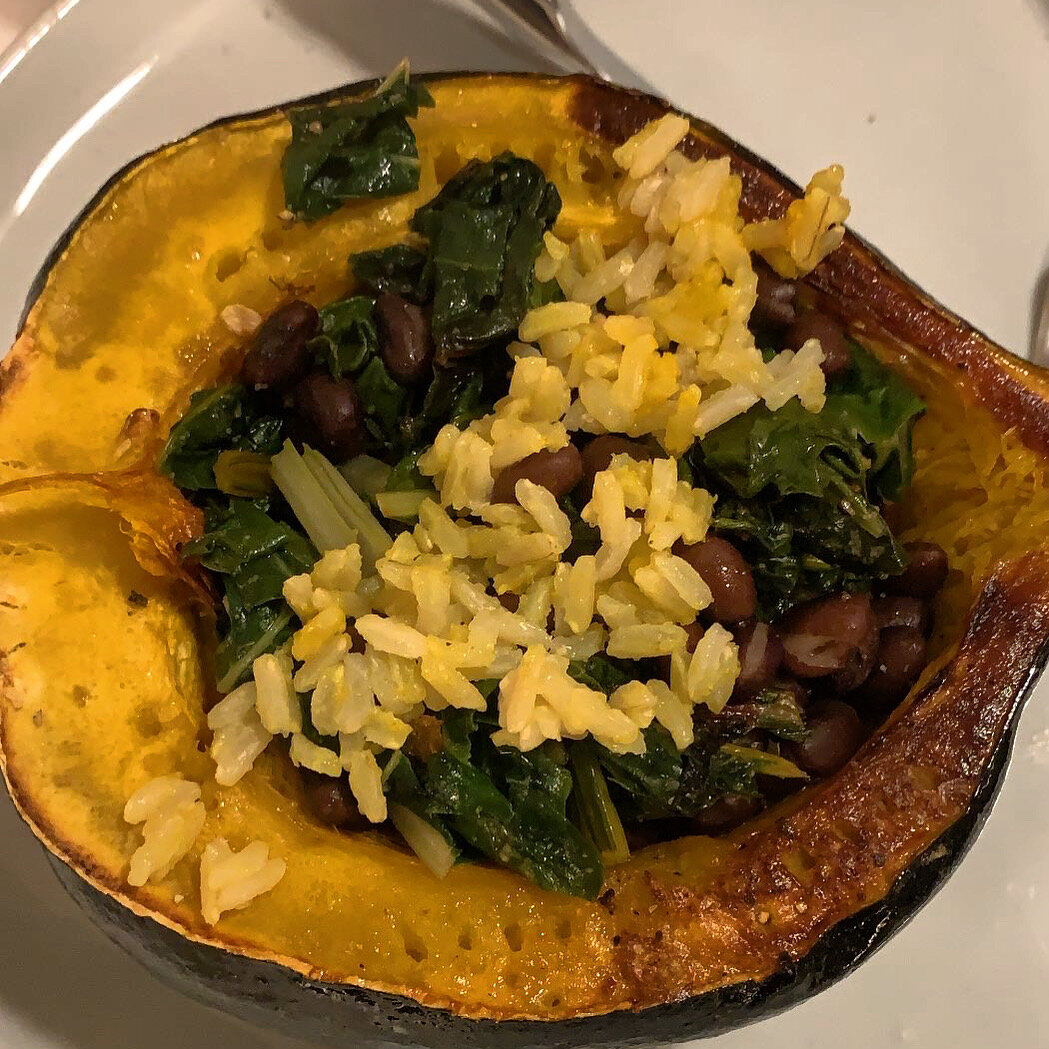
Stuffed Acorn Squash

CB5AF23B-DFBF-4975-84FE-747ACA8B3CBA.JPG

This recipe is for the cozy fall nights where you want something hearty, but not heavy. When you want something clean, yet fun! You can be so creative with this recipe and swap out proteins, grains. and greens. I personally love this recipe because I love eating out of bowls and now I get to eat out of an edible one!

Ingredients:

  • Acorn squash (pick your desired size)

  • Olive oil

  • 1 Cup cooked brown rice (or quinoa, buckwheat, orzo etc)

  • 1 Can of organic black beans (or desired protein, turkey meat, chicken, chickpeas etc)

  • 1 Bundle of chard (or kale, spinach or another leafy green)

  • 2 Garlic cloves

  • 1/2 tsp Turmeric

  • 1 tsp Garlic powder

  • Salt & pepper

Directions:

  1. Set your oven to 400F

  2. Wash and slice the acorn squash in half. Remove the seeds. (side note: you can toast the seeds in the same oven with olive oil and seasoning of your choice. Stir often and make sure not to burn them. hey are yummy healthy snacks! ). Inside the squash, sprinkle with a little olive oil, salt, pepper and splash of garlic powder. Place in the oven and cook for 40 minutes or until soft.

  3. Make 1 cup of rice following the directions on the package. When the rice is fully cooked and there is no more liquid, flavor the rice with turmeric, garlic powder, salt and pepper to taste. Stir evenly so that all of the rice turns a yellow tint.

  4. Open the can of black beans and rinse them. Place on a stovetop pan or in the oven to remove any excess liquid and to warm them up.

  5. Meanwhile, chop the garlic and place on a frying pan with a little olive oil. Wash and chop the chard and stems. Place the greens and the stems in the pan with garlic and saute evenly on medium heat for about 7 minutes. Season with salt and pepper

  6. Now it’s time to stuff your acorn squash! Mix your desired amount of rice/beans/greens together. Drizzle some olive oil on top and season with additional salt and pepper if needed.

  7. Enjoy this meal mindfully! Savor the caramelized taste of the roasted squash along with the comforting texture of the rice and beans.

Broccoli Rabe

Screen Shot 2020-07-27 at 4.03.39 PM.png

Broccoli Rabe is a super hearty bitter vegetable, but when it is cooked well it is so delicious and healthy! It is filled with vitamins A, C & K and has lots of calcium. This is a great vegetable to add to any pasta or make as a simple side dish to a main meat or fish dish.

Ingredients:

  • 1 Bunch of broccoli rabe

  • 4 garlic cloves (less if you don’t like garlic)

  • Olive Oil

  • Salt

  • Chili flakes and lemon (optional)

Directions:

  1. One bunch of broccoli rabe. Cut off the last inch of the stems and throw those away. Chop the broccoli rabe, including the leaves, into 1 inch pieces and then rinse well.

  2. In a pot, boil a few inches of water and add a hefty dash of salt to the water. Let the water come to a boil and then throw the broccoli rabe in. Cook until tender. About 2 minutes.

  3. Immediately rinse under cold water and you will watch the vegetable turn into this beautiful bright green color. Dry the broccoli rabe using a salad spinner, paper towels or let it sit for awhile.

  4. Chop or crush garlic and place in a frying pan with olive oil. When the garlic becomes translucent, and the smell of garlic fills your home, add the broccoli rabe and saute evenly for 1- 2 minutes. Make sure to not over cook. It is nice when there is a slight crunch and freshness to the vegetable. Optional to add pepper flakes here if you want a splash of spice.

  5. If you are enjoying the broccoli rabe as a side dish, add a squeeze of fresh lemon juice for some acid. Salt and pepper to taste. Otherwise mix the broccoli rabe right into a pasta sauce if you are combining it with pasta.

Parsnip & Leek Soup

The perfect fall cozy and comforting soup that nourishes your body.

Ingredients:

  • 4 Parsnips

  • 1 leek

  • 48oz Organic Vegetable broth

  • Splash of olive oil

  • Himalayan pink salt & pepper to taste

    (This recipe creates about 6-8 servings so it is great for batch cooking and freezing for easy simple ready to-go meals)

Directions:

  1. Rinse the veggies

  2. Horizontally slice the entire white part of the leek as thin as possible

  3. Chop the parsnips up in 1 inch sizes, discarding the tops and bottoms

  4. In a pot, let olive oil get warm and saute the leeks until translucent (5-10 minutes)

  5. Place the parsnips in with the leeks and cook together for 5 minutes

  6. Add the veggies broth and bring the pot of soup to a boil. Cook until the parsnips are soft and cut easily

  7. Place the liquid and the parsnips in a Vitamix or blender and combined evenly

  8. Season with salt and pepper to your liking

  9. Serve with a little olive oil on top and a few pumpkin seeds

Green Goddess Soup

Green Goddess Soup.jpg

I love this soup so much! I make this when I feel I want a reset or a dose of greens to lift me up with nourishing nutrients.

Ingredients:

  • Two big heads of broccoli and most of the stems

  • 1 yellow or white onion

  • Garlic powder, Salt & Pepper

  • Hand full of kale (without the stems)

  • 16 oz organic vegetable broth

  • Olive Oil

  • Optional: Nutritional Yeast, avocado

Directions:

  1. Wash the green vegetables and chop in 1 to 2 inch pieces. Slice onions

  2. In a big pot, saute onion until it is translucent and lightly caramelized (~5-10 minutes)

  3. Add broccoli and saute for a few minutes

  4. Add all of the vegetable broth and bring everything to a boil and cook until the broccoli is soft (~15 minutes)

  5. Add a big handful of kale and cook for another 5-minutes

  6. Flavor with garlic powder, salt & pepper

  7. Place the broth and vegetables in a blender (Vitamix makes this so smooth and creamy). You can do this in batches if your blender isn’t big enough

  8. Serve the soup in a bowl/cup—optional to mix in nutritional yeast and top with a few slices of avocado

  9. Save the leftovers in the fridge or freezer for easy meals for the week

Clean(ish) Blueberry Chocolate Chip Muffins with a Crumble Top

Ingredients:

  • 1 cup all-purpose flour

  • 1/2 cup whole wheat flour

  • 3/4 coconut sugar

  • 1/2 teaspoon salt

  • 2 teaspoons baking powder

  • 1/3 melted coconut oil

  • 1/3 cup oat milk or other non-diary milk

  • 1 1/2 cup fresh blueberries

  • 1/2 cup chocolate chips (optional…I think chocolate makes everything better but these would be bomb with just blueberries)

  • 1 egg

Crumble Topping Ingredients:

  • 2 tablespoons coconut sugar

  • 2 tablespoons brown sugar

  • 2 tablespoons almond meal

  • 1 tablespoon all-purposeful flour

  • 3 tablespoon butter, softened and cubed (If you use coconut oil make sure it is solid so you get texture.)

  • 1 teaspoon ground cinnamon

Directions:

  1. Preheat oven to 400F degree. Spray muffin tins or use muffin liners

  2. In a medium bowl (or in a kitchen aide bowl), mix all of the dry ingredients together

  3. Add the coconut oil, egg and milk into the mixture and mix evenly

  4. Add the blueberries and chocolate chips and gentle fold evenly into the batter

  5. Place the batter in the muffin tins

  6. Add all of the topping ingredients into a small bowl and use your hands to evenly combined so it turns into a crumble topping

  7. Place the toppings over each muffin

  8. Bake for 20-25 minutes. You will know it is complete when you poke a muffin with a knife or toothpick to make sure the batter is not wet

  9. Let them cool and enjoy or keep them covered for a few days

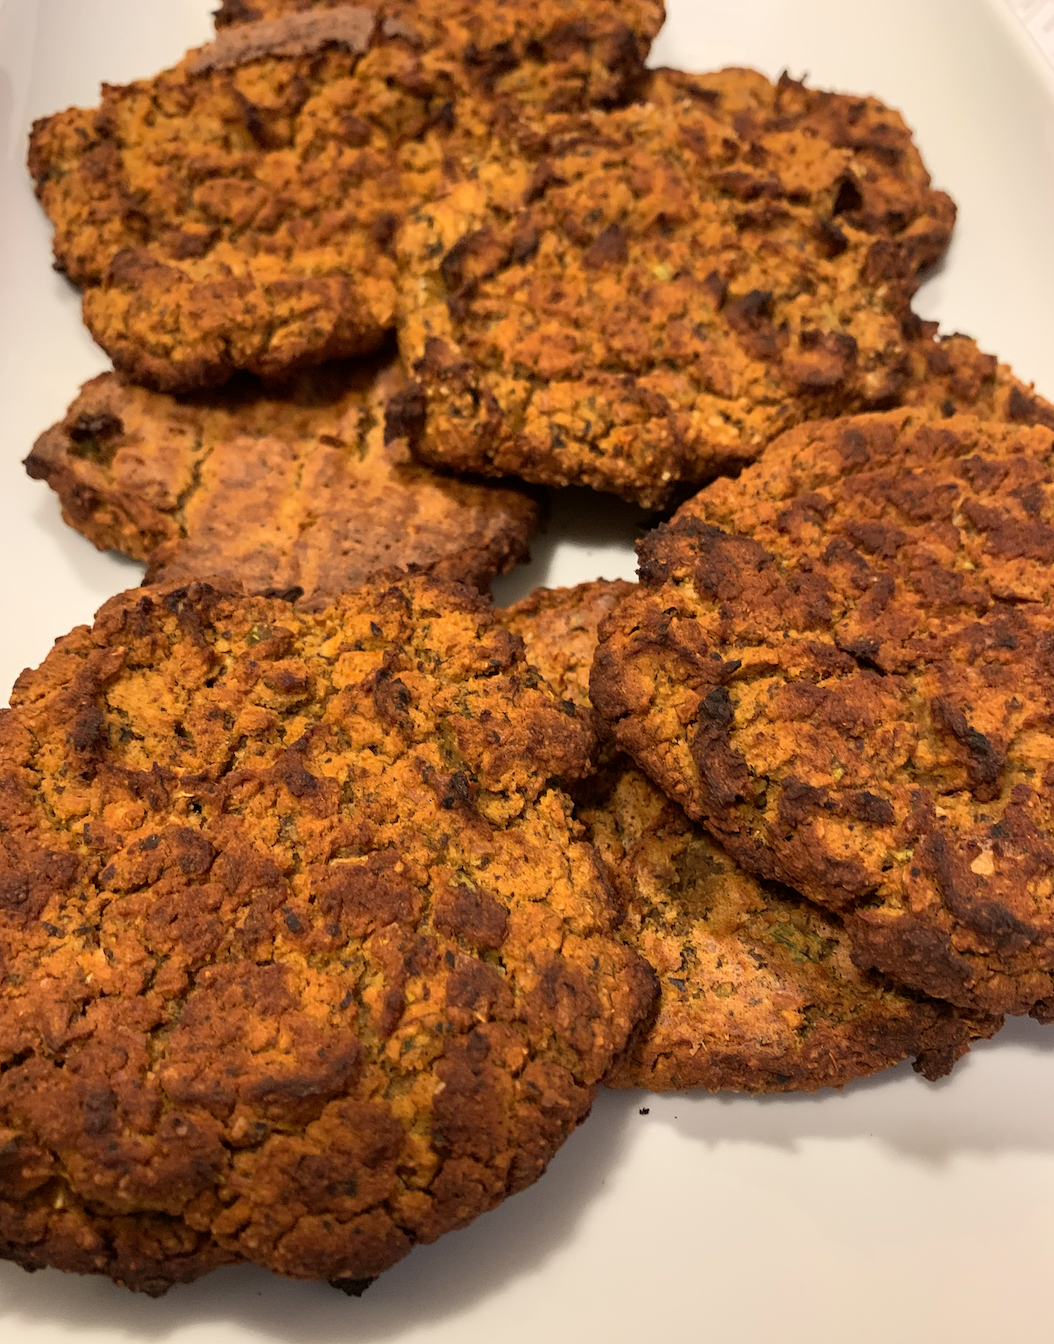
Sweet Potato Black Bean Burgers

Screen Shot 2020-07-22 at 3.50.03 PM.png

I am not going to lie…these burgers take some prep time in the kitchen upfront, but in the long run you are saving time with this batch cooking method.

Ingredients:

  • 1 medium sized sweet potato (previous cooked. Try roasting in the oven on 400f for 30-45 minutes until tender with a fork)

  • 1 small onion (~1/2 cup chopped)

  • 1 cup cooked black beans (from a can or previously dried and boiled

  • 4 garlic gloves

  • 1/2 tsp turmeric

  • 1 tsp garlic powder

  • 1/2 tsp cumin

  • 1 whole lime (or Tbsp lime juice)

  • 8 Tbsp almond meal

  • Optional (add any leftover fresh herbs from the fridge like parsley, basil, thyme or sage)

Directions:

  1. Preheat oven to 400F. Line a baking sheet with parchment paper

  2. Place all of the ingredients in a food processor and combined evenly (the batter will be sort of loose and that is ok. If it feels to wet, add more almond meal)

  3. Make desired sized patties on the parchment paper (keep in mind this batter should make around 8 thin ones).

  4. Cook in the over and flip around 30minute mark.

  5. Depending on your oven, these will take about 45-60minutes to cook.

  6. Enjoy on a salad, in a sandwich and freeze leftovers for easy healthy meals anytime!

Energy Balls

Screen Shot 2020-07-22 at 4.05.31 PM.png

These are such a great morning or afternoon pick me up. I personally love eating one (or two) in the morning with a cup of coffee or as a post workout snack. These energy balls are also great for mamas breastfeeding because the oats support lactation.

Ingredients:

  • 2 cups GF Rolled oats or puffed quinoa

  • 1 cup of natural organic peanut butter (keep the peanut butter room temperature before making these. It is easier to mix)

  • 3 Tbsp raw organic honey (add more if you like it sweeter)

  • 3 Tbsp chia seeds

  • 3 Tbsp ground flaxseed

  • 3 Tbsp hemp seeds

  • 1/2 tsp salt (if the nut butter doesn’t have any)

  • 1 tsp vanilla

  • 1/2 cup chocolate chips

Directions:

  1. In a big bowl or standing mixer, combined all of the ingredients. Mix well with a wooden spoon or your hands. Don’t be afraid to get messy. Remember you can’t make this recipe wrong so follow your body’s intuition of what you want more or less off.

  2. Grab a tupperware and roll the batter into Tbsp sized balls. Space out the balls evenly and put directly into the freezer.

  3. Let them sit for a minimum of 30-minutes before digging in. I personally, love to store them in the freezer so they have a great crunch, but you can also move them to the fridge if you like them softer.

  4. Enjoy each bite mindfully!

Roasted Veggies with Homemade Tahini

Screen Shot 2020-07-22 at 4.27.36 PM.png

Roasted veggies, no matter the season, always help me feel grounded and nourished. I never get sick of this recipe because you can always play around with different vegetables, which changes the taste, texture and color of the meal. Roasting veggies is a simple way to batch cook your vegetables and have them on hand. When selecting, which veggies to roast, I pause to think about:

  1. What are 3 different types of veggies I have access to in my fridge or at the store?

  2. Can I select variety of veggies with different colors/textures/fiber?

Ingredients:

  • 1 whole cauliflower head

  • 1/2 red cabbage

  • 4 big carrots (or 2 medium sized sweet potatoes)

  • 1 yellow onion

  • 1 Tbsp garlic powder

  • 1 tsp turmeric

  • Salt & Peppeer to taste

  • Chickpeas

Sauce:

  • 1/4 cup Tahini paste  (I love this brand)

  • 2 tablespoon soy sauce or Braggs Amino Acid 

  • 3 tablespoons freshly squeezed lemon juice 

  • 2 garlic cloves minced

  • 3 tablespoons water (add more for thinner sauce consistency) 

Directions:

  1. Pre-heat the oven to 400F 

  2. Wash and chop the veggies into 1-2inch. What do the veggies feell like as I rinse them under water? Notice how it feels to chop. Where is your attention?

  3. Dry the vegetables and place in a bowl

  4. Lightly drizzle the olive oil over the vegetables and coat evenly

  5. Add salt, pepper, garlic powder, turmeric. What do these smells remind you of?

  6. Evenly place vegetables on a cooking sheet and notice the variety of colors and textures. What comes alive inside of you as you look at the colors?

  7. Roast for about 30-40 minutes. Take vegetables out when they are browned with a slight crunch.

  8. Meanwhile, on a separate pan, place cooked chick peas and roast until they have a crunchy flavor and start to dry out. This should take around ~15 minutes. 

  9. In a small blender, combined the ingredients for the tahini sauce and adjust the flavoring to your desire. What do you notice about the smells of the sauce as you blend?

  10. When the roasted vegetables and chick peas are done, place everything into a bowl and pour in the tahini sauce to coast everything evenly. Add additional salt and pepper to fit your flavor profile.

You can follow this same recipe with different vegetables and protein. For instance, try a different legume or use a chicken breast. I also love doing this recipe with butternut-squash, onions, beets and Brussels sprouts.

You can use this chart as inspiration to select a veggie from different categories. This supports the body getting a variety of nutrients.

Rainbow Salad

Nourish_Banner.jpg

I love cooking with color! The idea of fueling my body with a variety of vegetables that have a variety of nutrients gets me so excited! Not only do I love hydrating my cells with vegetables, but I love the concept of keeping my body strong from the inside out. Eating raw foods and lots of variety of color energizes my senses.

One of my favorite ways to make a salad (or any dish for that matter) is to tap into my inner artist and use color for inspiration! There are no real rules or directions with a Rainbow Salad, but all you get to do is make a rainbow by using as many colored vegetables that you have in your fridge.

In this salad, I used mixed greens, red cabbage, red peppers, a shredded golden beet  and shredded carrots. Shredding the beets and carrots helps to bring out the sweetness in the vegetables and also adds a softer texture to the salad when there is already some crunch thanks to the cabbage and red peppers.  

Garden Dressing (my measurements are not exact since I use my intuition to create). 

In a blender I combined:

  • 1 garlic clove

  • 1/4 tsp mustard seed (seedy mustard would also work!)

  • 2 pinches of dried thyme

  • 2 pinches of dried basil

  • few celery seeds

  • salt

  • pepper